
Mautic is WordPress equivalent of Marketing. It is an open-source software that you can host on your own server and send marketing campaigns to your contacts.
More than 200K organisations use Mautic for marketing automation. It is a very powerful tool for any kind of audience size and any volume of E-mails you send out to your contacts.
If you already use Mautic, You already know the value of Self-hosted solutions. But, If you are just getting started, Let’s see all the benefits you get when you decide to self-host your Marketing automation.
Why use self-hosted Solution?
A person, or a group of people realise the value of self-hosted solutions when the pricing of the hosted solution starts going out of control. Believe it or not, sooner or later, The pricing WILL start going out of control as your requirement grows.
Let me explain you with a simple example. Let’s say you are using Mailchimp for E-mail marketing and automation. And let’s assume you have 10k+ contacts and you want to send 100k E-mails this month.
For this use case, if you decide to Mailchimp, Your monthly spend will be higher than $100 ($1200+ a year!). And, It will become more and more expensive when your requirements grow.
Why hosted Marketing automation is expensive?
It’s simple. They provide you the user interface that you can use to send E-mails and manage your campaigns. They provide you interface to monitor the clicks and opens for each of your E-mail marketing campaign. And they also provide you the E-mail builder and automation builder to help you make your project successful.
More than that, They provide you everything out-of-the-box. You just have to verify your domain and import your contacts. After that, You can practically start sending marketing campaigns in minutes.
That is the exact reason why the hosted marketing solutions are expensive.
How is self-hosted solution better than the hosted solution?
Self-hosted means one thing. You control your installation of your E-mail marketing and automation software. You can modify it however it fits your requirements. And, You do not have to pay high prices for every E-mail you send.
There are a few explainable benefits of using a self-hosted solution.
- Open-Source Code: Most of the self-hosted marketing solutions are open-source. It means that your installation will get free software and security updates, Just like WordPress. Hundreds or Thousands of developers might be working on the software for increased efficiency. And you get all the updates for free.
- All The Features: It’s an in-direct benefit you get because of the open-source nature of self-hosted solutions. Usually when you go with a hosted solution, You might not get all the features except if you purchase the most expensive plan. It’s not the case if you decide to self-host your E-mail marketing and automation software.
- No Limits on Contacts: Yes, You are hosting the software on your own server, so you do not have limits on number of contacts you have in unlimited number of lists. Go crazy on adding new contacts and do not worry about potentially losing the contacts that you might not need temporarily.
- No Limits on number of E-mails: It’s the same again. No one is going to put limits on the number of E-mails you are sending from your own server, right?
- Cheap Per-Email Pricing: Self-hosted does not mean you are sending E-mails directly from your server. You would have to use an SMTP provider’s server. Which means that you are still going to pay per E-mail, but it will be very cheap. For example, If you decide to use AWS SES as an SMTP provider, You will be charged as low as $0.1 for every 1000 E-mails. In simple words, 100K E-mails will cost you only $10 per month.
These are some of the benefits you get if you decide to use a Self-hosted E-mail marketing solution. Now, Let’s see how much it will cost you in comparison with an Hosted solution. You will be surprised, Compare the pricing with your current solution.
The cost of setting up a Self-Hosted E-mail marketing Solution
Yes, The E-mail marketing software is Open-source. But everything else that creates a complete E-mail marketing solution is not free, and never be free. These expenses however, Is tiny in comparison with what you are going to pay to a hosted solution when you scale. We will see a few cases after understanding the costs involved.
- Server: You need a server to host an open-source software that you can use. A server can be a VPS, Cloud instance, Dedicated server or a Bare metal server. You can get started with $5 server from Vultr or Digitalocean or any other cloud platform. If you just have a few thousand contacts, You do not need a server bigger than 2GB RAM, which usually costs $10-12 per month.
- Server Management: Once you have a plain server with just OS Installed, You would have to set up and manage that server. Management involves things like initally configuring a server with LAMP or LEMP. Then, creating a website configuration onthe server and then monitoring a server. This will cost you $4.72 per month if you use ServerAvatar.
- SMTP Provider: SMTP provider is also known as an SMTP Relay. You need SMTP relay because the E-mails are sent via the server of your SMTP provider. They deliver your E-mails from Good quality E-mail servers and white-listed IP addresses. Your own server might not be white-listed or it might get black-listed in future. It’s not the cases with an SMTP relay if the health of your account is good. If you use AWS SES, The cost to send E-mails via SMTP relay is $0.1 for every 1000 E-mails.
Now, Let’s see the cost you will incur if you decide to self-host your E-mail marketing and automation solution.
Case 1: Low Volume
If you are sending 10000 E-mails every month to 2000 of your contacts, The cost of self-hosting your E-mail marketing would be.
- Server: $10 per month
- Deployment and Management: ~$5 per month (Including Backups)
- SMTP Relay or Service: $1 per month (AWS SES pricing is $0.1 for 1000 Emails)
So, If you are sending 10k E-mails a month, Your monthly cost will be $16 per month. Which is less than $200 a month.
Now Let’s see how much it will cost you if you decide to scale your E-mail marketing activities.
Case 2: Medium Volume
If you are sending 50,000 E-mails every month to 8000 of your contacts, The cost of self-hosting the E-mail marketing solution would be.
- Server: ~$20 per month (Bigger server for bigger volume)
- Deployment and Management: ~$5 per month (Does not change much)
- SMTP Relay or Service: $5 per month (AWS SES pricing is $0.1 for 1000 E-mails)
So, you scaled from 10k E-mails per month to 50k E-mails per month, Your monthly cost will be $30. However, Your cost of sending E-mails is not 5x. It is 2x. Which means, less than $400 a month.
Case 3: High Volume
If you scale further and now you send 300k E-mails every month to 50k of your contacts, The cost of self-hosting the E-mail marketing solution would be.
- Server: ~$70 per month (Bigger server for high volume)
- Deployment and Management: ~$5 per month (Does not change much)
- SMTP Relay or Service: $30 per month (AWS SES pricing is $0.1 for 1000 E-mails)
Again, You can see scaling from 50k E-mails a month to 300k E-mails a month does not cost you 6 times more. It’s hardly 3x more.
Overall, The self-hosted version will be more affordable for you. You can compare it with your current managed hosting provider. In most cases, Self-hosted will be better.
Most important is, You do not have soft or hard limits on number of contacts and E-mails. You can add as many contacts and send them as many E-mails as you want.
Self-hosted E-mail marketing and Automation comes with a real pay-as-you-go pricing.
Now, Let’s see How to set it up so that you can start marketing with a free mind.
Set up Self-hosted E-mail Marketing Automation with Mautic
It is not as complicated as it sounds. Here are the steps you have to follow to deploy your own instance of Mautic. If you do not know, Mautic is a self-hosted E-mail marketing and automation software that is open-source.
- Select an SMTP Relay
- Create a Server
- Connect a Server with ServerAvatar
- Deploy Mautic with Auto-installer
It is a process containing 4 major steps you have to follow. Let’s get started with the first one.
Step 1: Select an SMTP Relay
An SMTP relay or an SMTP provider allows you to route your E-mails from their servers. They are expert at maintaining the quality of the infrastructure required to send E-mails and maintain the deliverability.
There are lots of SMTP relay services available in the market. You can select any one of them.
For this example, I am going to use AWS SES (Simple E-mail Service) as an SMTP relay. It is because it is the cheapest and has pay-as-you-grow pricing model, accurate down to a single E-mail.
If you do not want to use AWS SES, You can go with any service you want.
To Do: Once you select and register for a specific SMTP service, You have to get the following information from the interface of your SMTP provider. You will need this information
- SMTP Host
- SMTP Username
- SMTP Password
- SMTP Port
We will need this information while deploying Mautic.
If you are new to Mautic, You can use Mailtrap to create a testing environment – It will provide you SMTP information and a Mailbox to catch all the E-mails sent via that SMTP info. It will not actually send an E-mail to your subscriber. Once you are done with testing, Just update the SMTP information and you will be able to send E-mails to your subscribers.
Pro Tip
Now, If you are clear about the role of an SMTP provider and have the SMTP information for your account, Let’s move to the step 2.
Step 2: Create a Server
The next step is to create a server with Ubuntu 18.04, 20.04, or 22.04 operating system with no pre-installed application. Just a plain server with the required operating system.
There are lots of Cloud computing services you can use. Some of the most recommended are.
- AWS EC2 (Free 62K Outgoing E-mails per month if you use AWS SES)
- Digitalocean
- Vultr
- Linode
- RackSpace
- Google Cloud
- Hostinger
- and your favourite server provider.
All you need is a server with plain/clean/minimal Ubuntu 18.04 or Ubuntu 20.04 installation. You can get this server from any VPS/Dedicated/Bare-metal provider or a cloud platform.
What is Plain installation? It means that the server should not have any pre-installed application or a site. You can add more than one site or application on that server once it is connected with ServerAvatar. However, at the time of connection, The OS should be plain.
Step 3: Connect a Server with ServerAvatar
ServerAvatar is an only control panel that allows you to auto-install Mautic on your server. If you do not exactly know what is ServerAvatar, It is a generic self-managed cloud hosting management panel. It simply allows you to configure your server with optimised LAMP or LEMP stack in minutes.
Then you will get a complete panel to manage and monitor your server without any technical knowledge. You will also get support for all the server level errors you might face, which you won’t if you follow this guide.
There are multiple ways to connect your server with ServerAvatar. Here are the exact tutorials for a few cloud platforms.
- Connect a DigitalOcean Droplet
- Connect a Hostinger VPS
- Connect a Linode Instance
- Connect a Vultr Cloud Instance
Do not worry if you do not use any of these services. If your server is from any XYZ server provider, You can use the methods given below.
- Connect with IPv4 Address only
- Connect with IPv4 and Root Password
Additionally, You can integrate your ServerAvatar account with following services to even automate the server creation process.
Once your server is connected, You can deploy various PHP applications on your server from the control panel itself.
Once the server is connected, You can auto-install Mautic. Let’s see how to do it.
Deploy Mautic with Auto-Installer
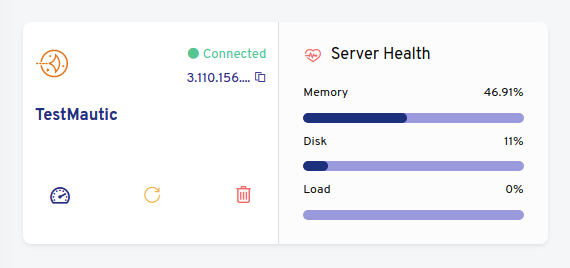
Once you have the connected server in your ServerAvatar account, You will see it like the following image on the dashboard.
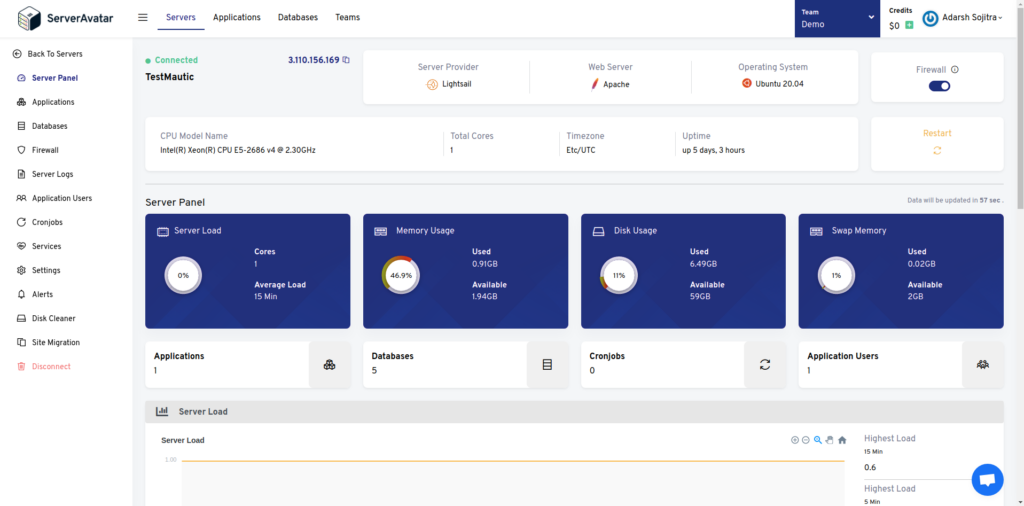
Once you have something like this, Click on the first option or the name of the server. Then you will see the server panel just like the following image.
Once you can access the server panel, You have to create an application.
An application is a an instance of a site on a server. A site can be anything that runs on HTML, CSS, JS or PHP. A site can use MySQL to manage data. It can be a WordPress site, It can be an API for your mobile app, It can be a self-hosted open source platform. You can host any kind of site that runs on the above given languages.
When you create an application, ServerAvatar will create directories, users, set permissions and manage server configuration files for that site.
Follow this short step-by-step tutorial to learn How to create an application on your server with ServerAvatar.
Once you have created an application, You will be redirected to the application panel where you can manage all the aspects of your site like Files, Logs, PHP settings, Backups, Cloudflare integrations, Staging area, DNS and much more.
The application panel will look something like the following image.

Once you have created an application, You can install Mautic on that application with Mautic Auto-installer.
For that, Click on the Auto-deploy option from the left sidebar of an application panel. Once you are there, You will see many auto-installers just like the following image.
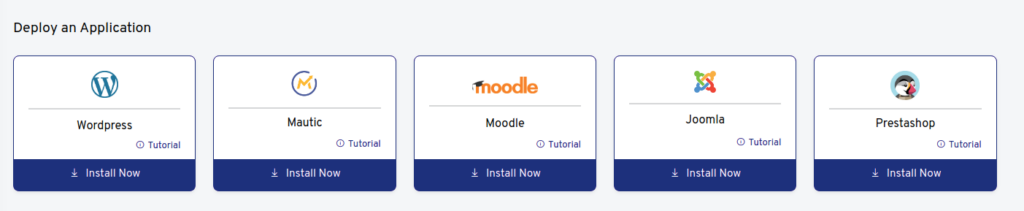
Click on the Install Now button in the Mautic card. After that, You will see a form with 3 sections. Just like the following image.

In the first section, Enter the information of the Admin user. You would have to provide the first name, last name, Login username, Login password, Admin E-mail and the title of your Mautic Installation. Ignore the database server if you do not know what to install.
A Username should not be the E-mail, It should be an alpha numeric string.
In the second section, Select a desired PHP version. By default, ServerAvatar will only allow you to install Mautic on supported PHP versions.
In the third section, Enter the SMTP information you received from your SMTP provider. Follow the first step if you haven’t generated SMTP information yet.
Once you have provided all the information, click on the Install Now button.
Once the installation is started, It will take around 30 seconds to install Mautic for you. It will also create a database on the server and connect it with the app for you.
Once installed, You can log in to the admin area of your Mautic installation and start E-mail marketing!
Congratulations, You now have a self-hosted E-mail marketing and Automation solution on the cloud.
Conclusion
Mautic is used by more than 2,00,000 organisations for E-mail marketing automation. Lots of big organisations use and support Mautic for High volume requirements. E-mail marketing and automation is very affordable that way.
More than that, You do not even have to worry about Server errors or you do not need any technical knowledge to set up your own E-mail marketing solution. Everything at the server level can be automated with ServerAvatar.
Finally, I hope you found an awesome self-managed self-hosted E-mail marketing solution. If you have any questions, Feel free to comment in the comment section. We will be more than happy to help you with this topic.