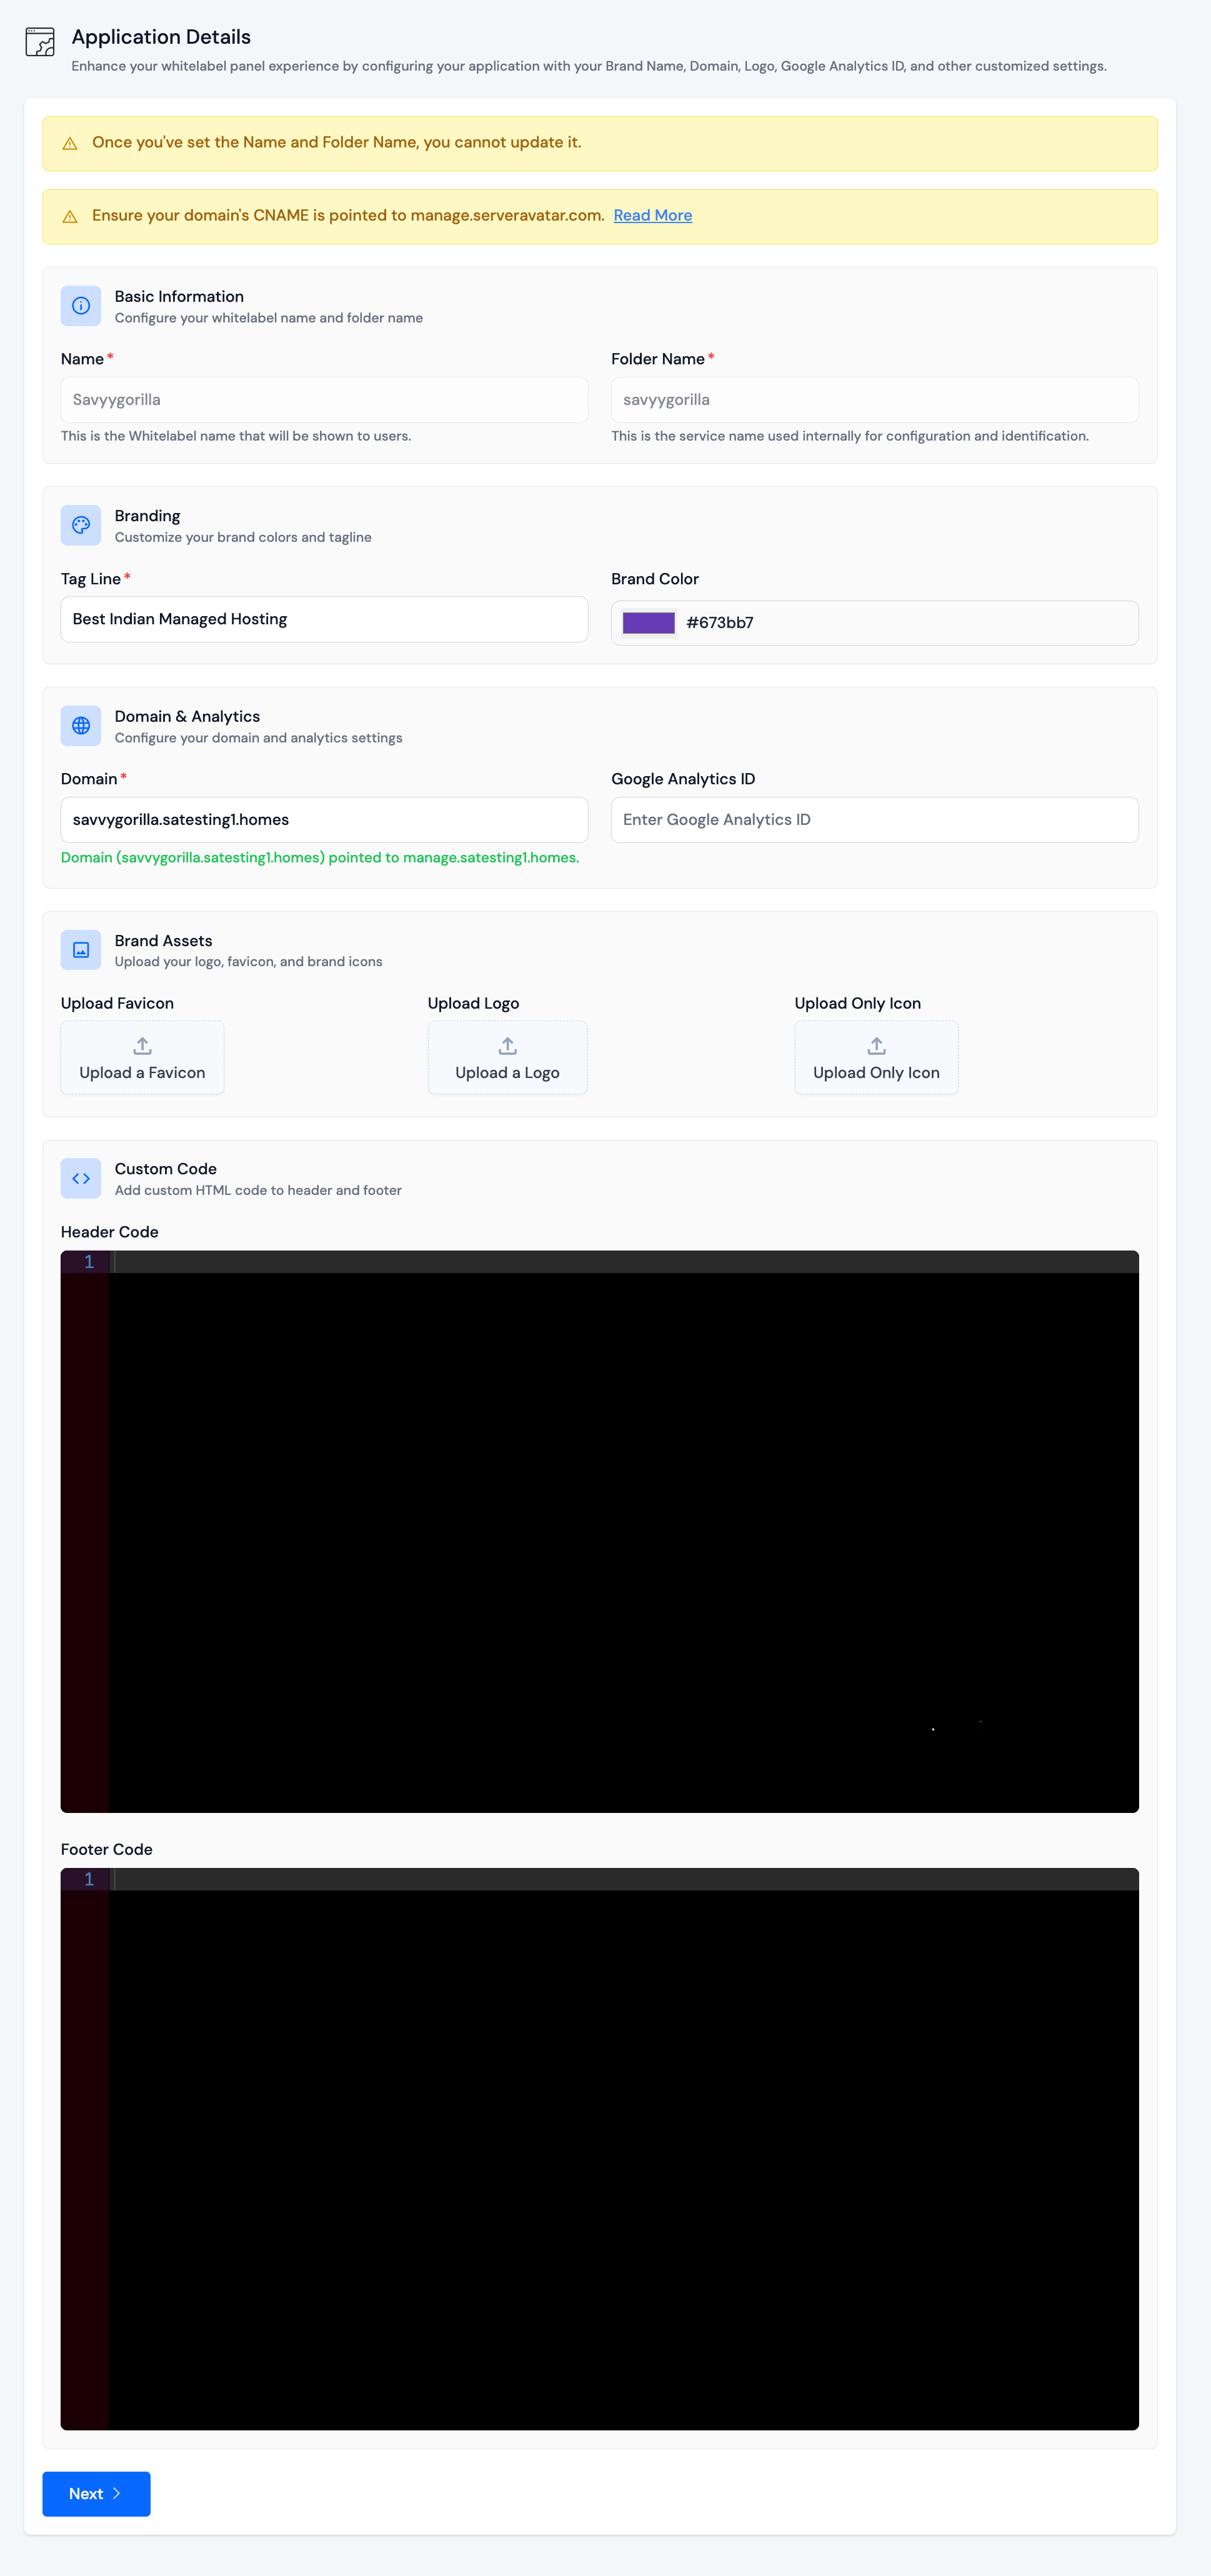
Application Details
This documentation will walk you through the process of setting up your whitelabel panel with basic details to customize your branding and access your panel.
Required Information:
Name: Enter the desired name for your whitelabel panel.
Folder Name: The folder name is used for the panel's services and in various other places, like backup provider integration and many other areas where folders are created.
Tagline: Add a catchy tagline that represents your panel.
Brand Color: Primary color for your panel's theme.
Domain: Domain for accessing your whitelabel panel.
This field is essential for accessing your panel.
Note: You must point your domain's CNAME record to manage.serveravatar.com to proceed. See instructions below on How to Point CNAME Record to manage.serveravatar.com.
Google Analytics ID: If you have a Google Analytics ID, enter it here for tracking purposes.
Favicon: Upload a favicon icon for your panel. If you do not set a favicon, the ServerAvatar favicon will be used.
Logo: Upload your logo with the brand name. If you do not set a logo, the ServerAvatar logo will be used.
Only Icon: Upload a logo without the brand name if you prefer an icon-only version. If you do not set an icon-only logo, the ServerAvatar icon will be used.
Header: Add custom code (e.g., for font styles) to be included in the <head> section.
Footer: Add any custom footer code you want to include.
You can't save changes or go to the next step until your domain is pointing to manage.serveravatar.com.
Save the Changes.
Congratulations! You have completed the application details setup for your whitelabel panel.
Update Panel Details
After completing the entire setup process for your whitelabel panel, you'll see the whitelabel dropdown menu in the sidebar.
Navigate to Whitelabel > Applications Details.

From this page, you can update your whitelabel panel's details.
How to Point CNAME Record to manage.serveravatar.com with DNS Provider
To access your whitelabel panel using your custom domain, you need to point the CNAME record of your domain to manage.serveravatar.com.
-
Log in to Your DNS Provider Account
Access your DNS provider's account. -
Navigate to DNS Settings
Once logged in, navigate to the DNS settings section for the domain you want to use with your whitelabel panel. -
Add a New CNAME Record
- Look for an option to add a new record (usually labeled as Add Record or similar).
- Choose CNAME as the record type.
- In the Name or Host field, enter your preferred subdomain name.
- In the Value or Target field, enter manage.serveravatar.com.
Important: If you're using Cloudflare, ensure the proxy status is set to DNS Only.
After entering the details, save the new CNAME record.
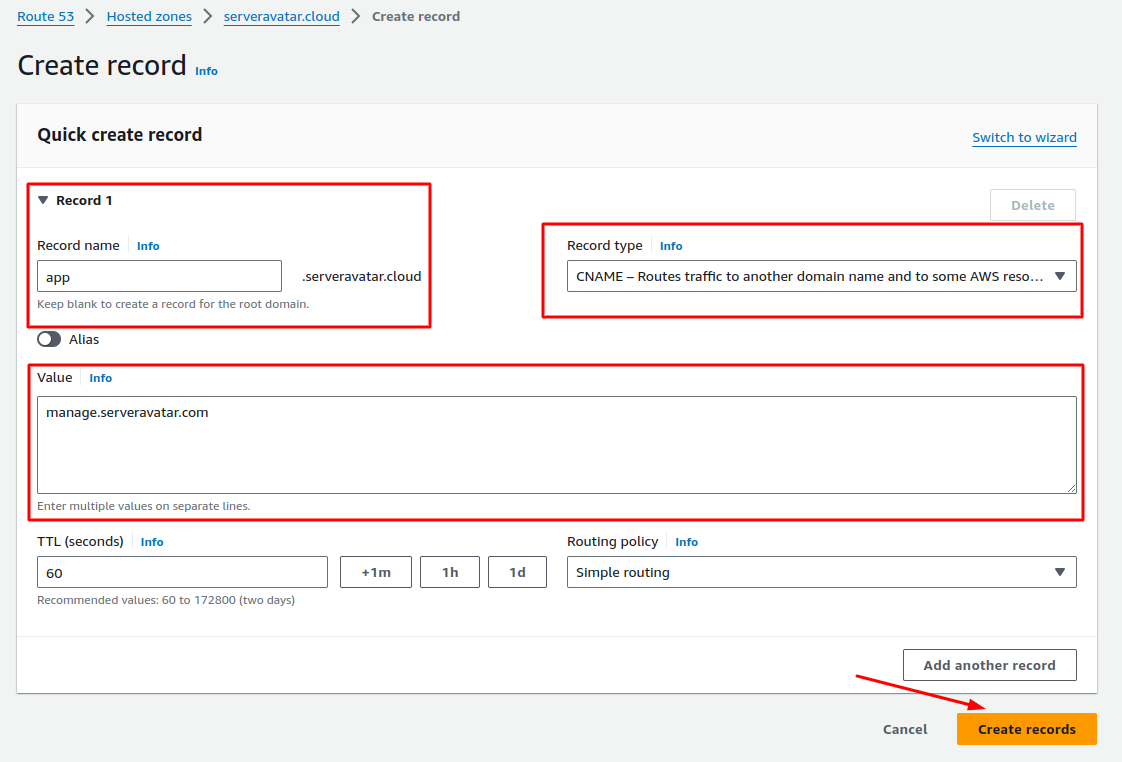
- Verify Changes
Allow some time for the DNS changes to propagate. You can verify the changes by checking the DNS records for your domain. Once the changes have propagated, your domain will be correctly pointed to manage.serveravatar.com.