Git Integrations
Git integration enables your users to deploy applications using Bitbucket, GitHub, or GitLab repositories. This documentation guides you through the setup process for each provider, so you can easily integrate them into your whitelabel panel.
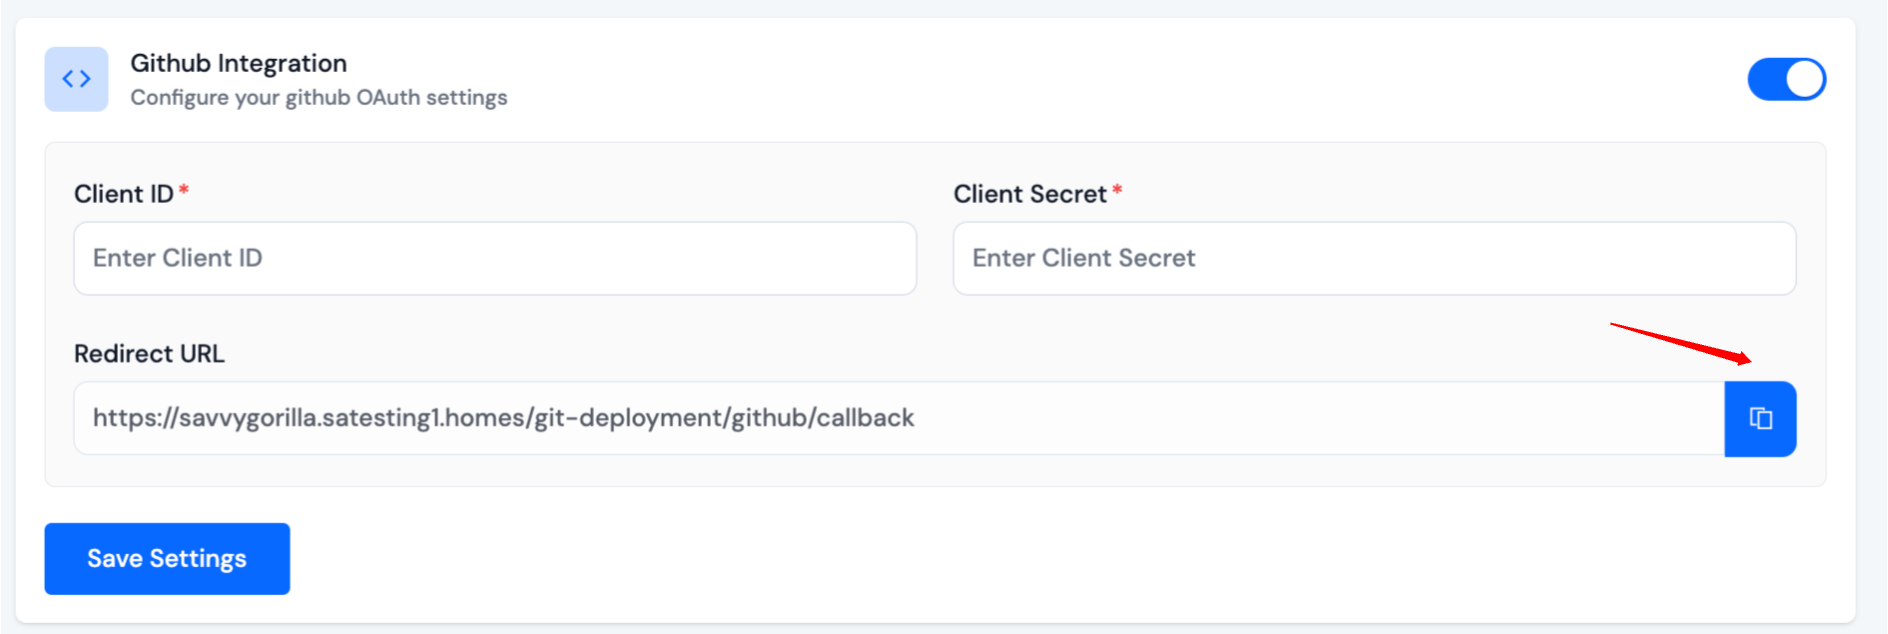
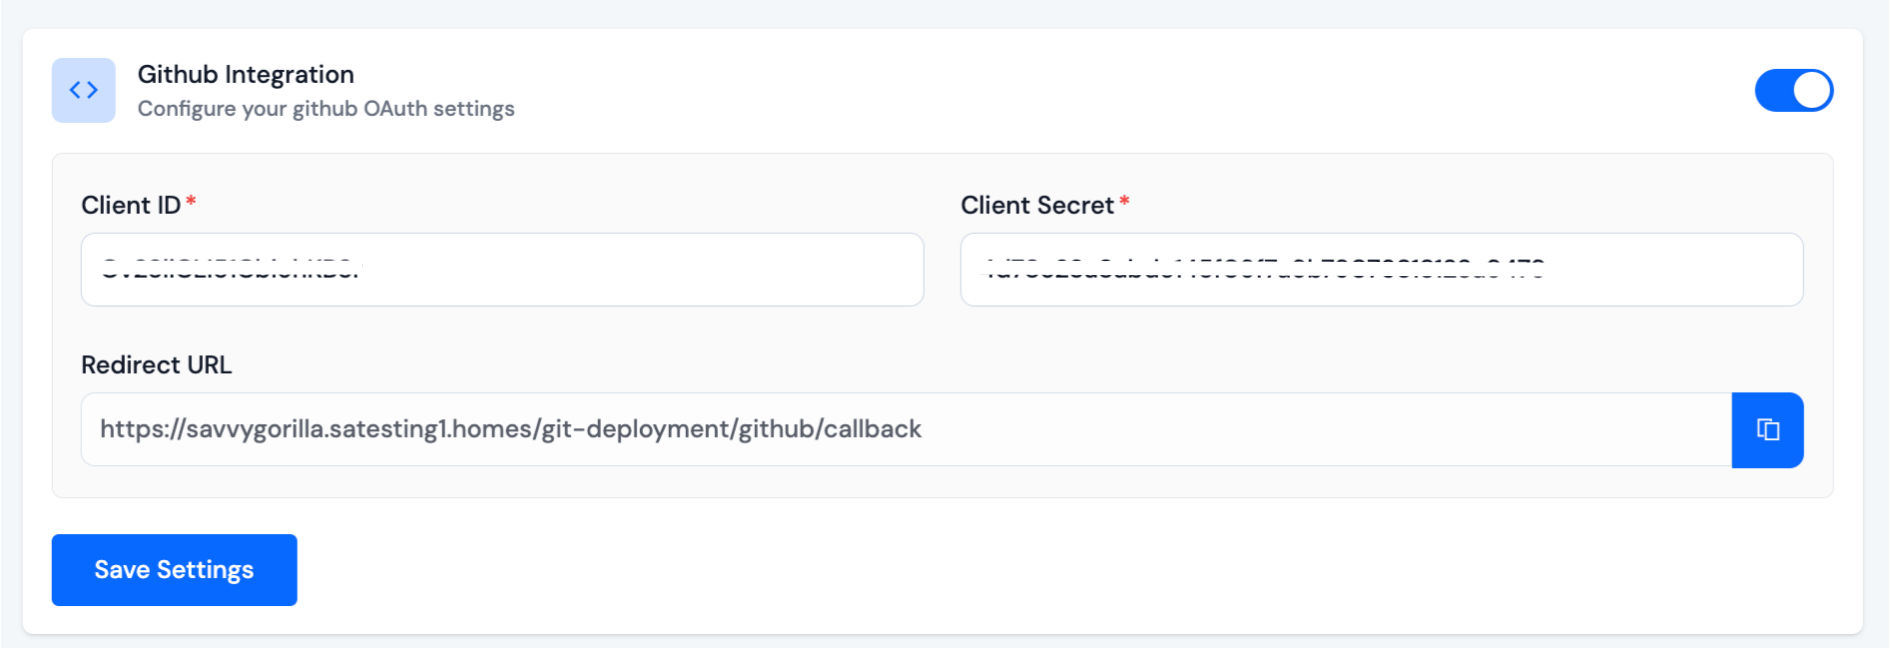
Github Integration
Step 1: Obtain Client ID and Client Secret
- Log in to your GitHub account.
- Navigate to Settings > Developer settings > OAuth Apps. The following link will take you to that page: https://github.com/settings/developers.
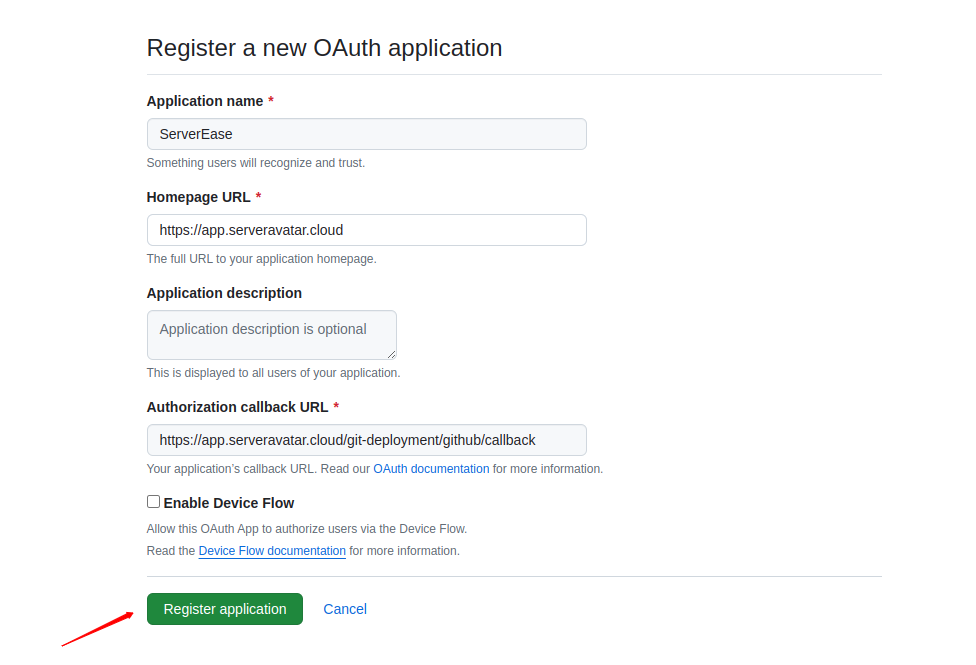
- Click on Register a new application to create a new application.

- Fill in the required details such as Application name, Homepage URL, Authorization callback URL (Redirect URL provided in the whitelabel panel's Github integration form), etc and click on Register application.
In the OAuth App settings on GitHub, ensure the Authorization callback URL matches the Redirect URL provided in the whitelabel panel's Github integration form.
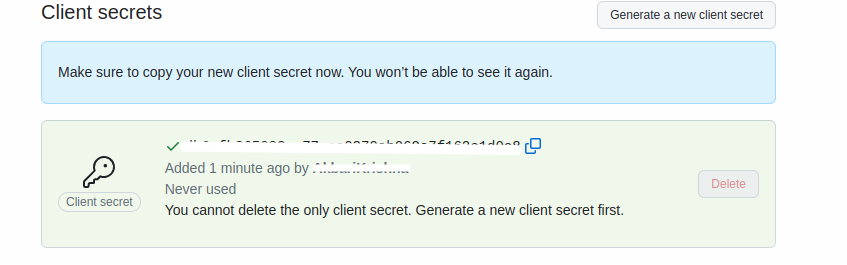
 5. Generate a Client Secret.
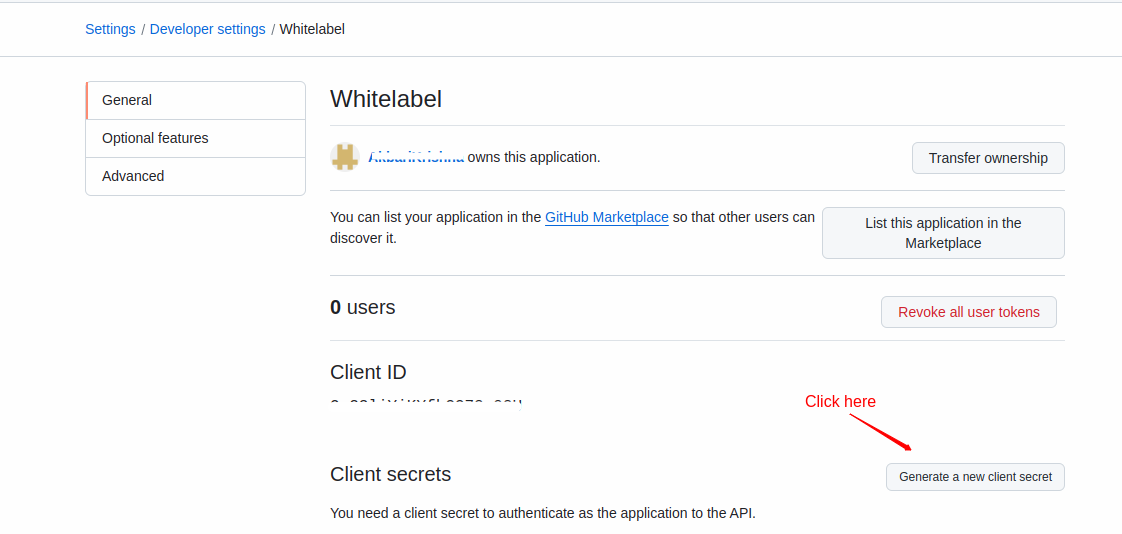 6. Upon creation, note down the Client ID and Client Secret generated for your application.
Step 2: Save Configuration
Enter generated Client ID and Client Secret and click on Save Settings button.
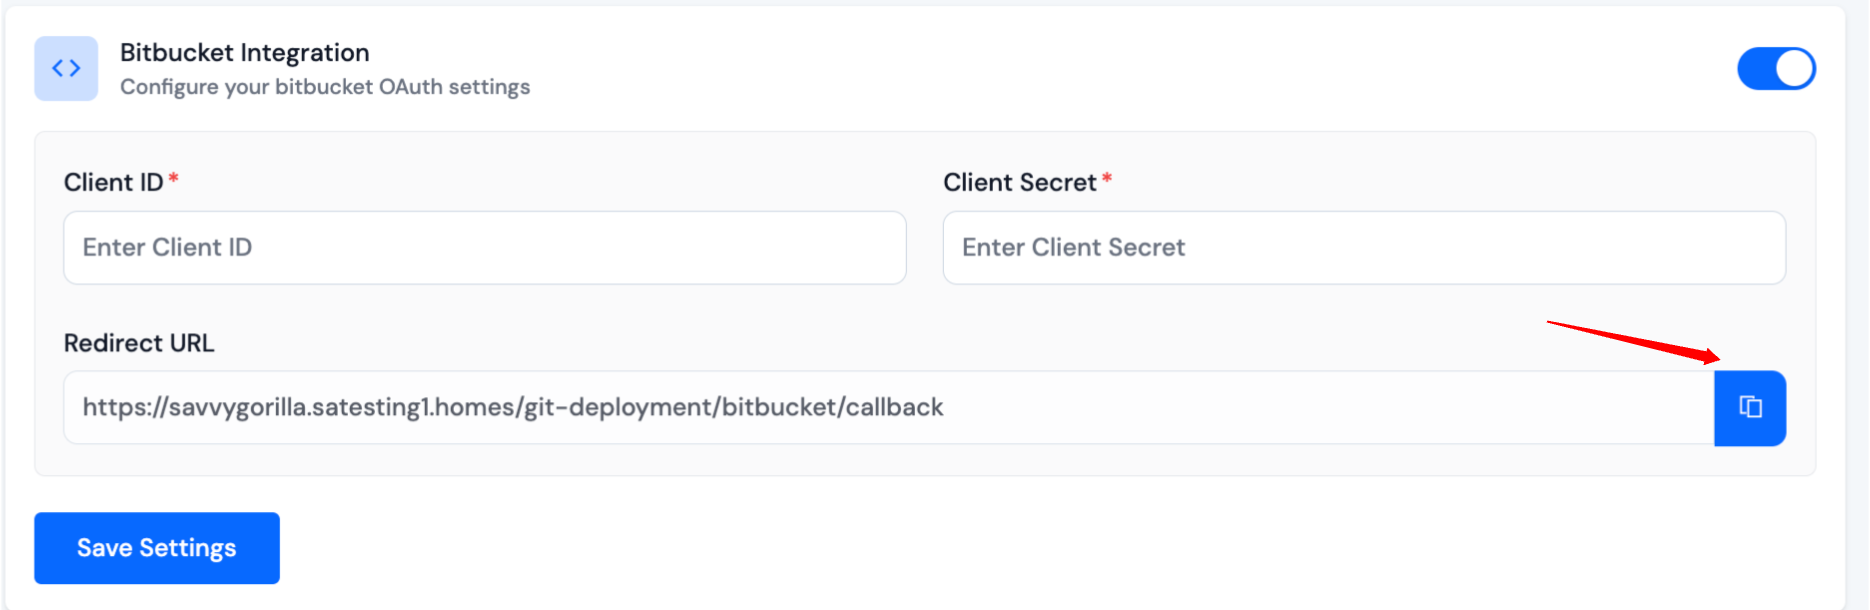
Bitbucket Integration
Step 1: Obtain Client ID and Client Secret
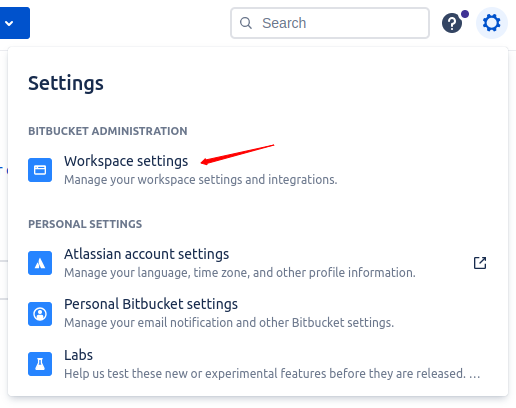
- Log in to your Bitbucket account.
- Go to Settings > OAuth consumers and Click on Add consumer to create a new OAuth consumer.
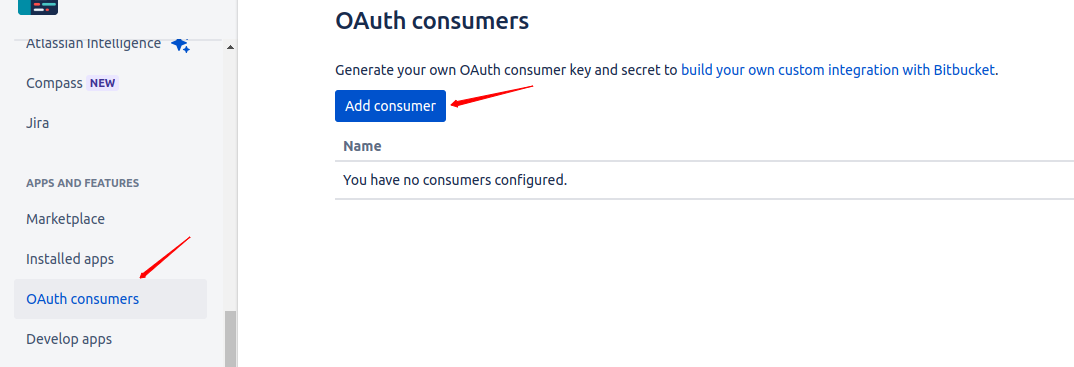
- Provide details like Name, Description, Callback URL (Redirect URL provided in the whitelabel panel's Bitbucket integration form), etc.
In the OAuth App settings on Bitbucket, ensure the Callback URL matches the Redirect URL provided in the whitelabel panel's Bitbucket integration form.
Please ensure that you select the permission indicated in the image below.
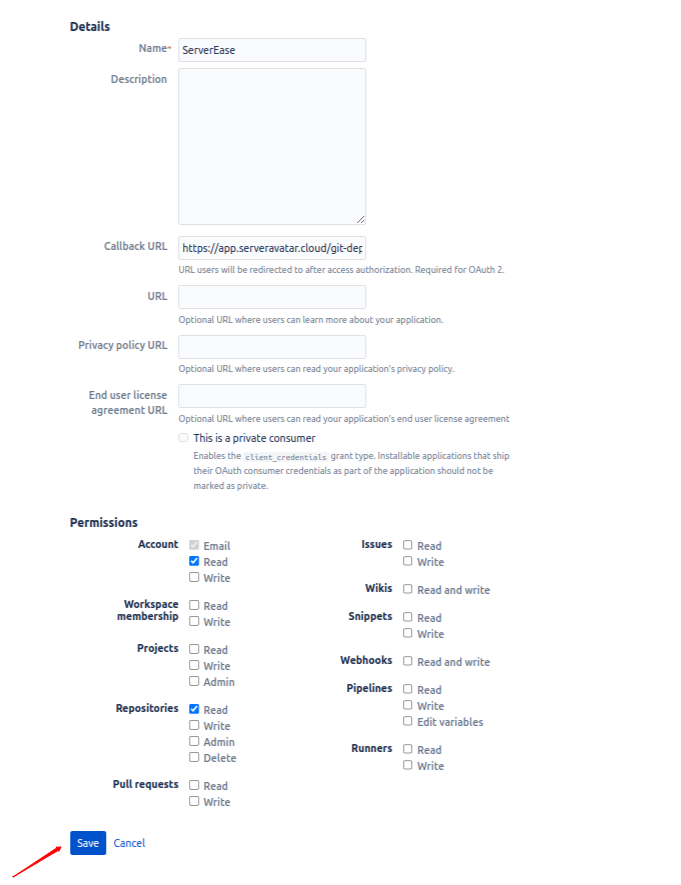
- After creation, copy the Client ID and Client Secret generated for your OAuth consumer.

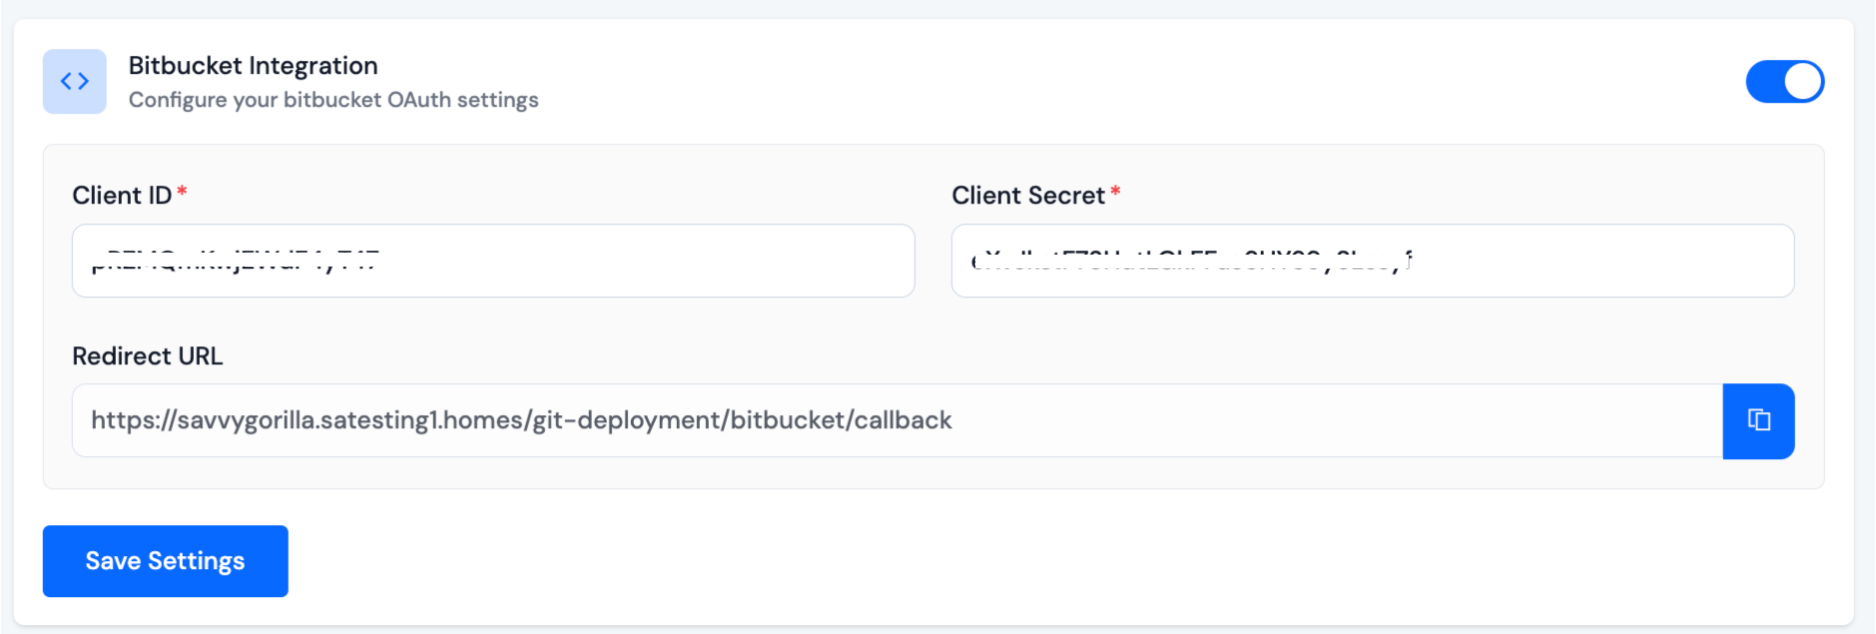
Step 2: Save Configuration
Enter generated Client ID and Client Secret and click on Save Settings button.
Gitlab Integration
Step 1: Obtain Client ID and Client Secret
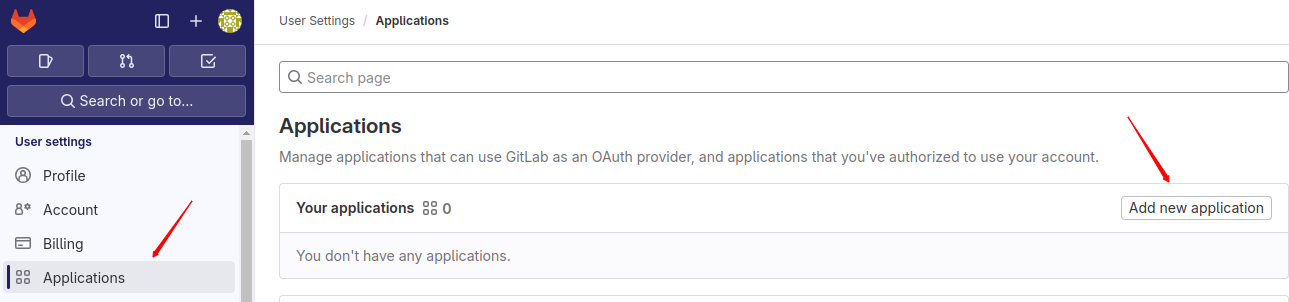
- Log in to your Gitlab account.
- Navigate to User settings > Applications and click on Add new application.
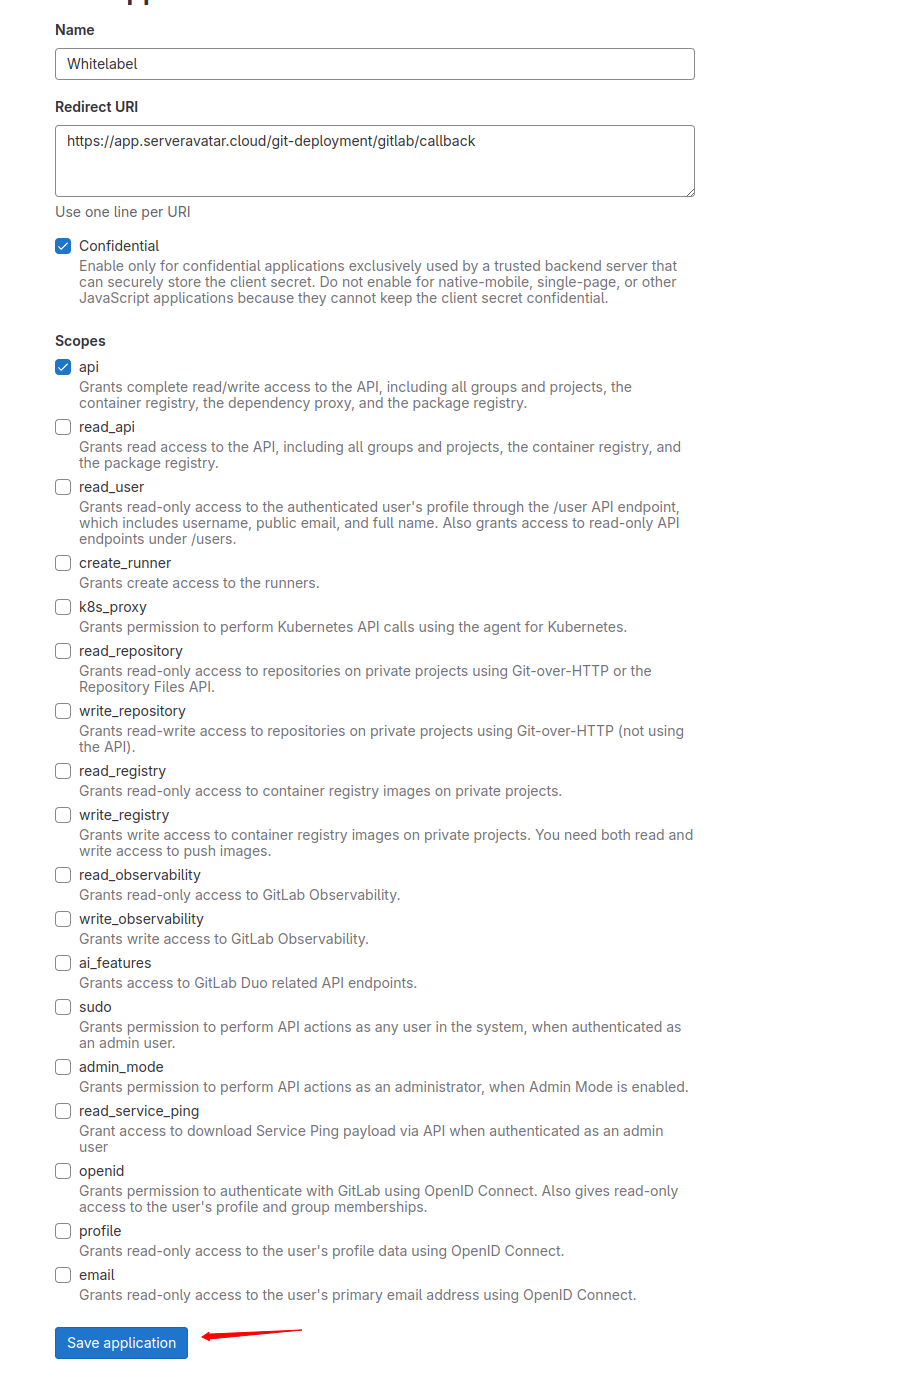
- Fill in the required details like Name, Redirect URI (Redirect URL provided in the whitelabel panel's Gitlab integration form), Scopes, etc.
In the OAuth App settings on Gitlab, ensure the Callback URL matches the Redirect URL provided in the whitelabel panel's Gitlab integration form.
Please ensure that you select the scopes indicated in the image below.
- Upon creation, copy the Application ID and Secret Key for your OAuth application.

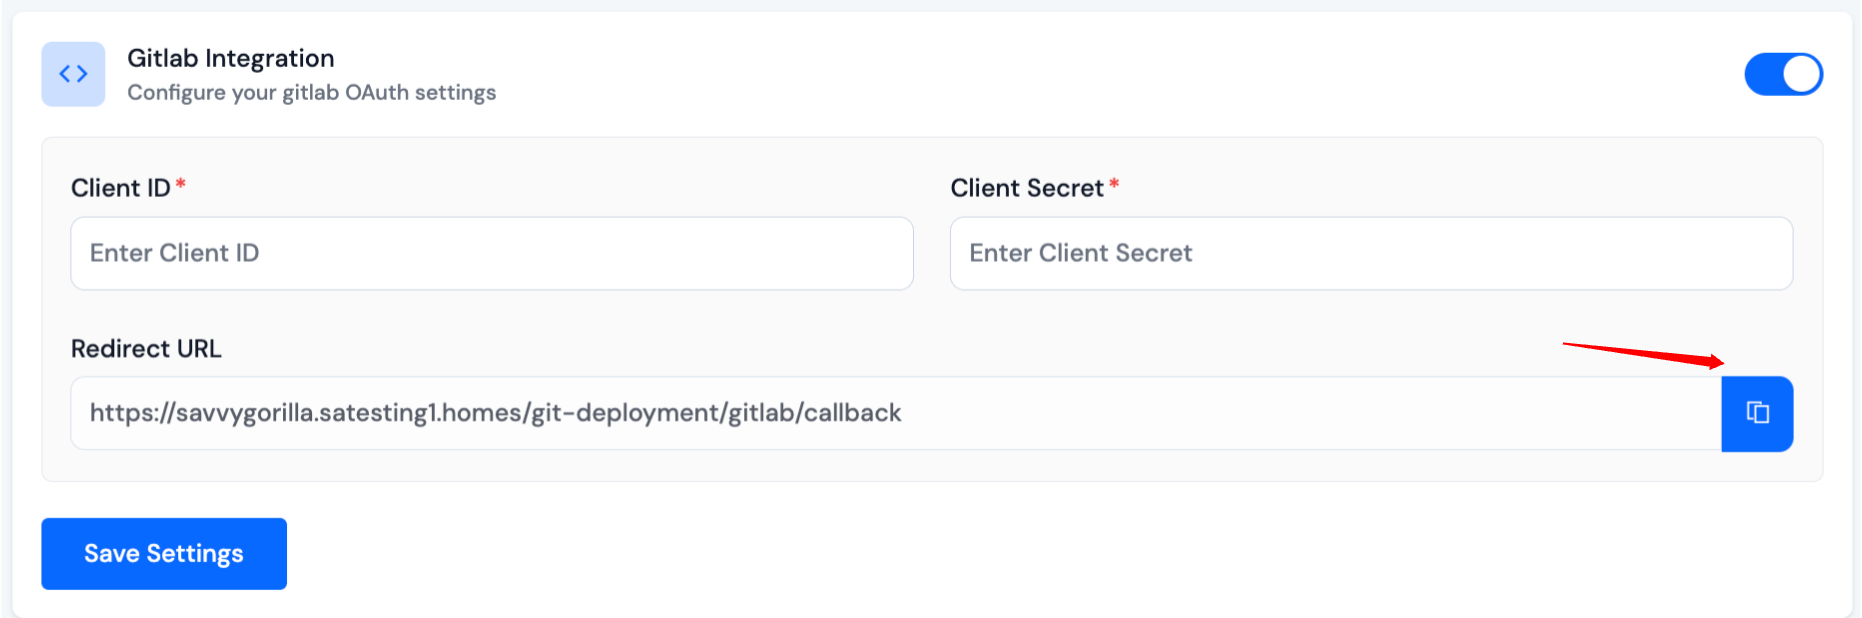
Step 2: Save Configuration
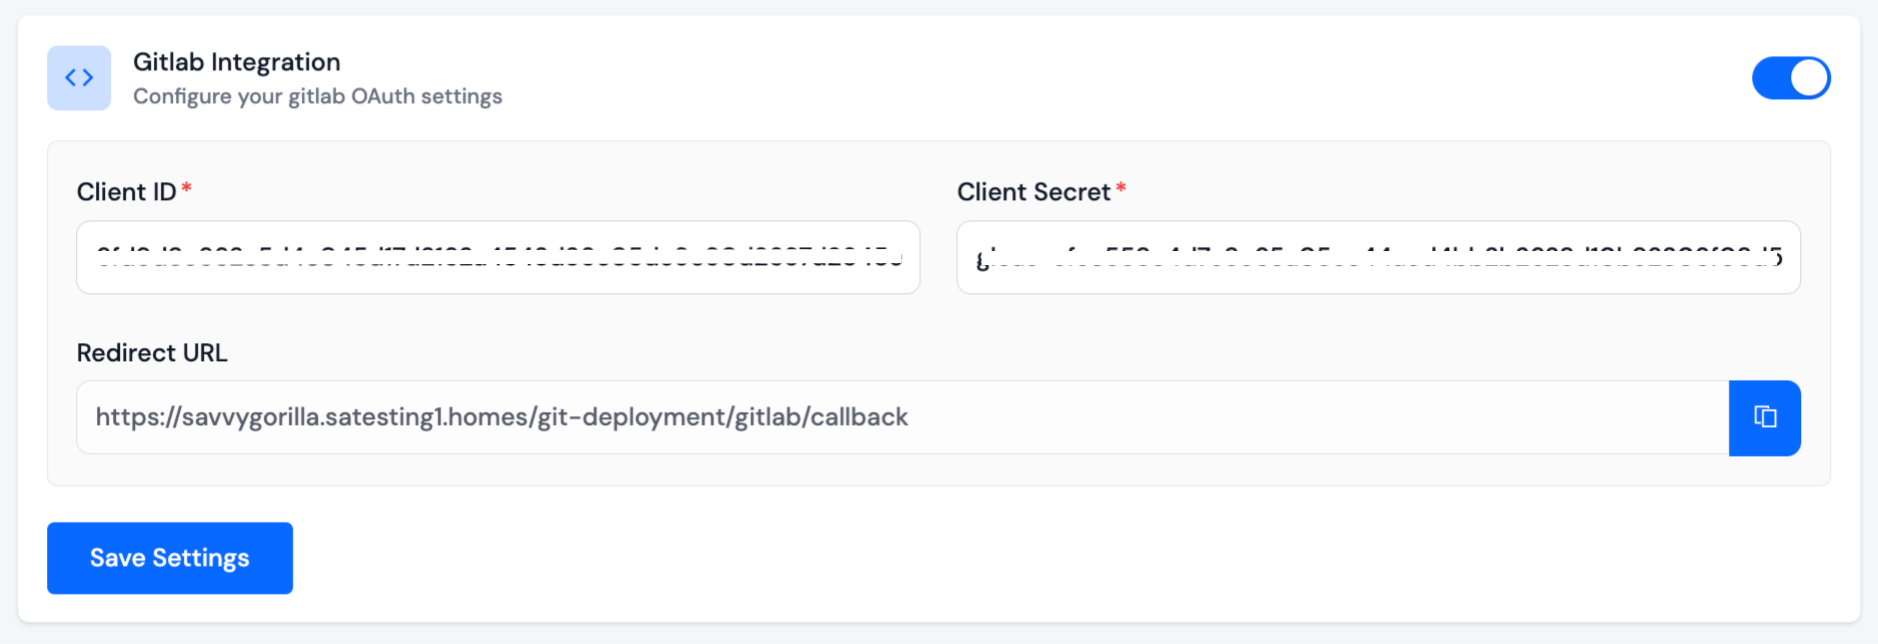
Enter generated Client ID and Client Secret and click on Save Settings button.
Update Git Provider's Credentials
After completing the entire setup process for your whitelabel panel, you'll display the whitelabel dropdown menu in the sidebar.
Navigate to Whitelabel > Git.
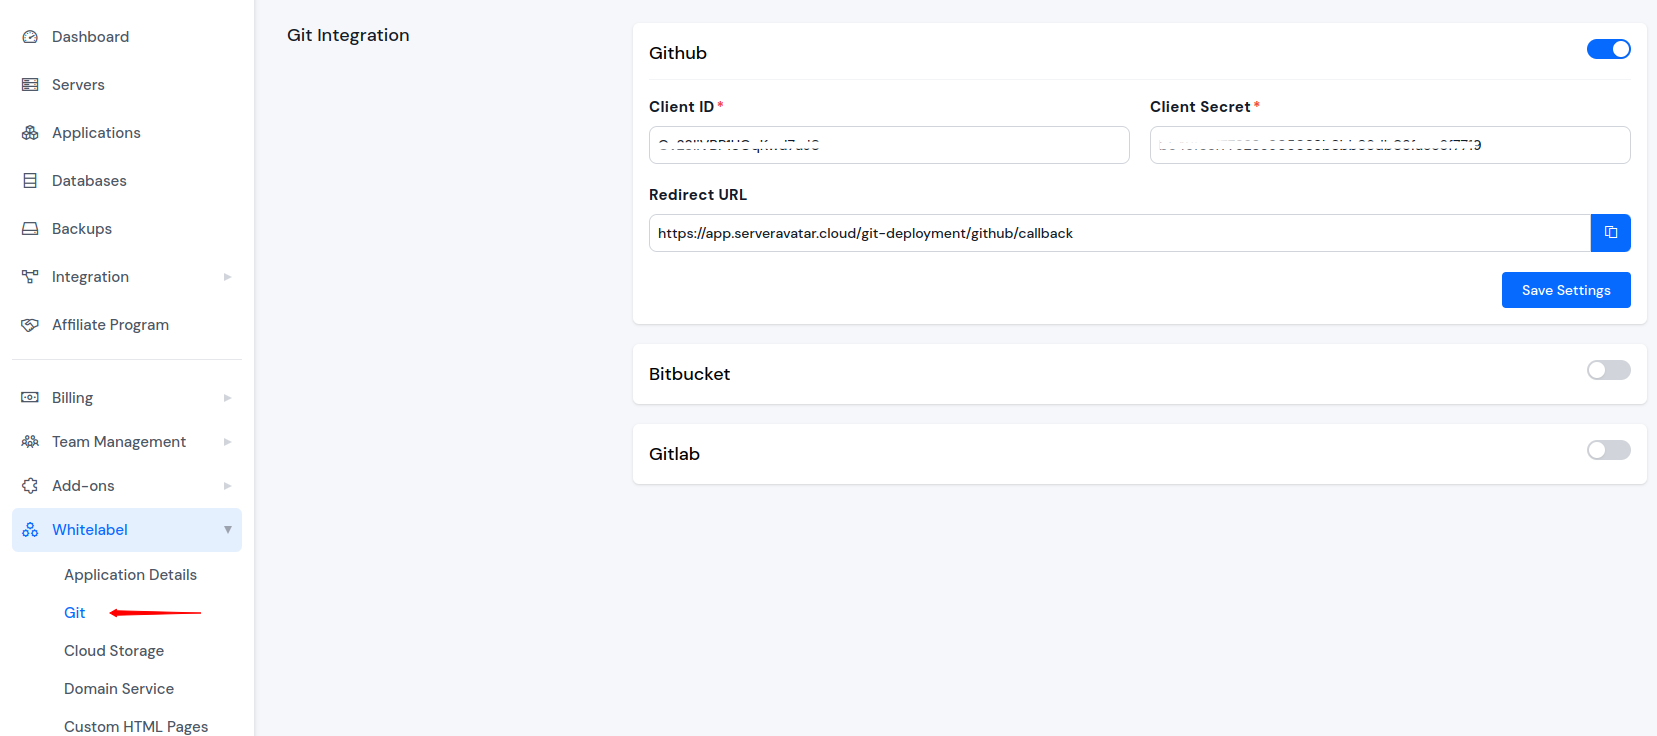
From this page, you can update your credentials.
If you change your Git provider's credentials, the existing Git provider integrations for your users will not work.