Control Panel Access
The Control Panel is the server management interface your users or team use to manage a server—add applications, databases, and perform day-to-day tasks. It can be shown as part of the Whitelabel Panel: if you have purchased and configured the Whitelabel Panel, the Control Panel will display your branding; otherwise it shows ServerAvatar branding.
Control Panel Access is a per-server setting. When you enable it, you create a separate login (username and password) for the Control Panel, optional limits on how many applications and databases can be created, and a set of permissions that define what users can do in the panel. This is useful when you want to give clients or team members access to manage a server without giving them your main ServerAvatar account.
Follow the steps below to enable and configure Control Panel access for a server.
Step 1: Log in to your ServerAvatar account.
Step 2: Open the server you want to configure by clicking its Dashboard button.

Step 3: In the server’s left sidebar, go to Settings.
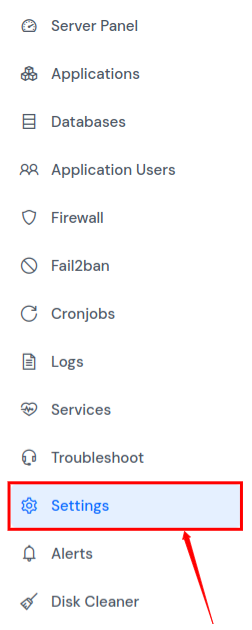
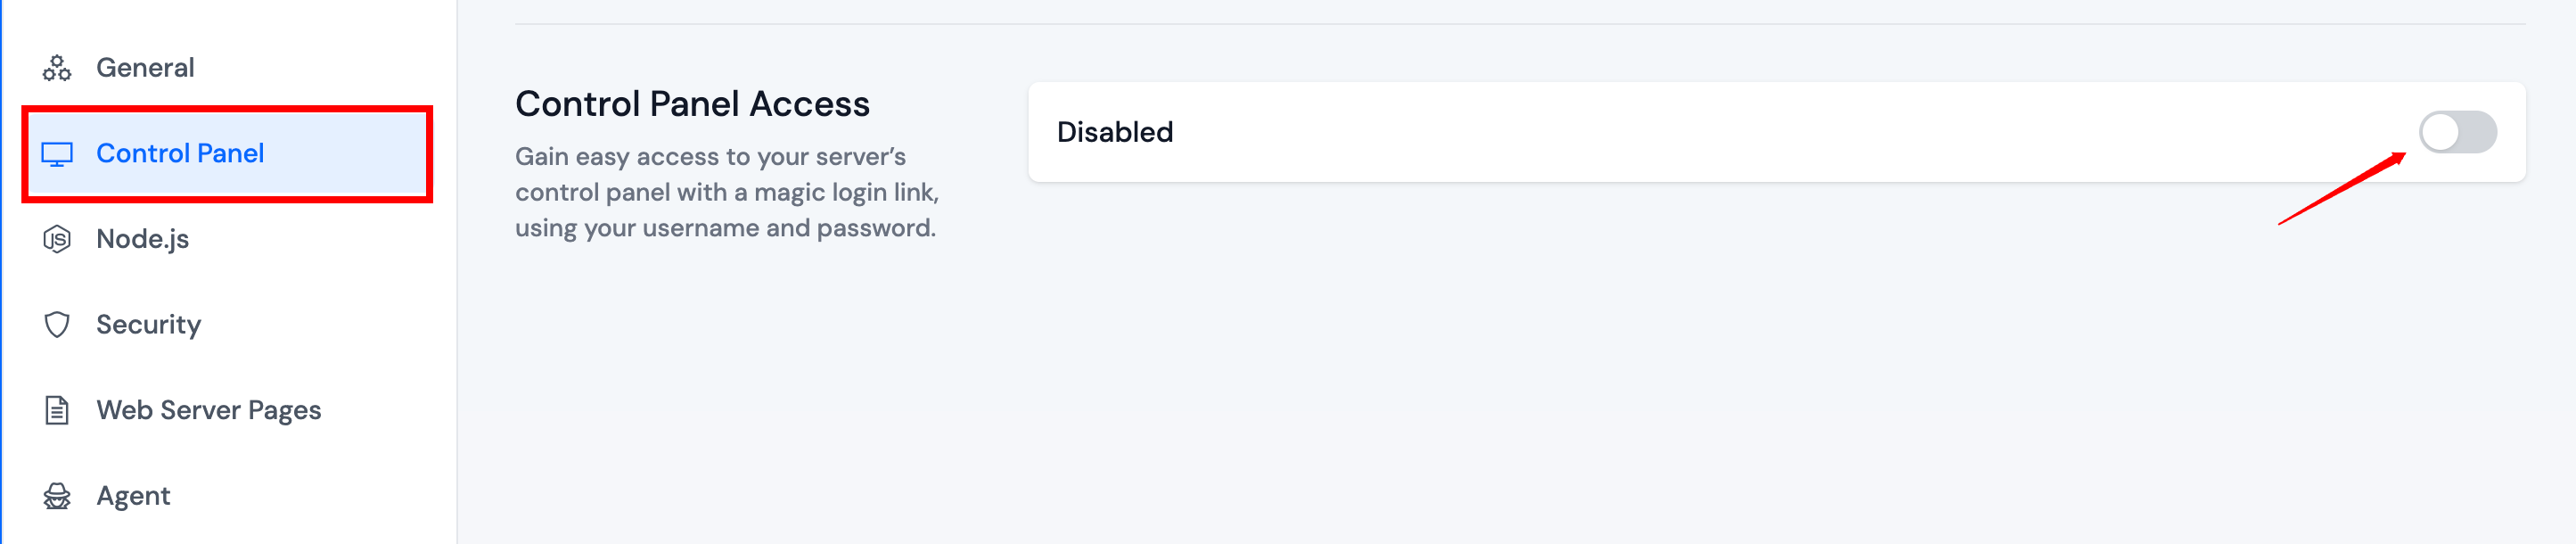
Step 4: In the settings sidebar, click Control Panel. Turn the switch on to enable Control Panel access.
Set username and password
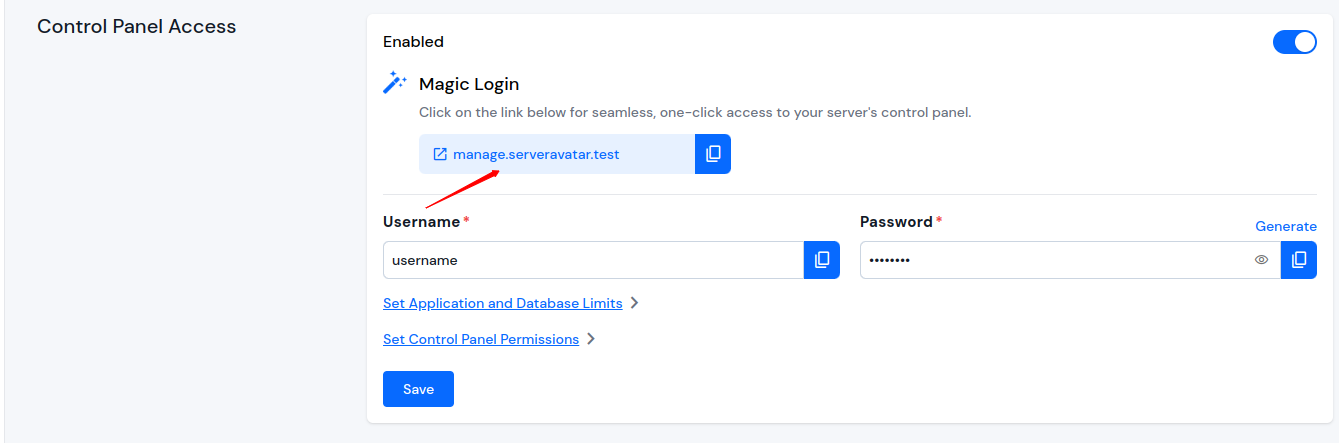
After you enable Control Panel access, the Username and Password fields appear. Enter the credentials that users will use to log in to the Control Panel. Choose a strong password and store it securely; you can share it with the people who should have access.
Application and database limits
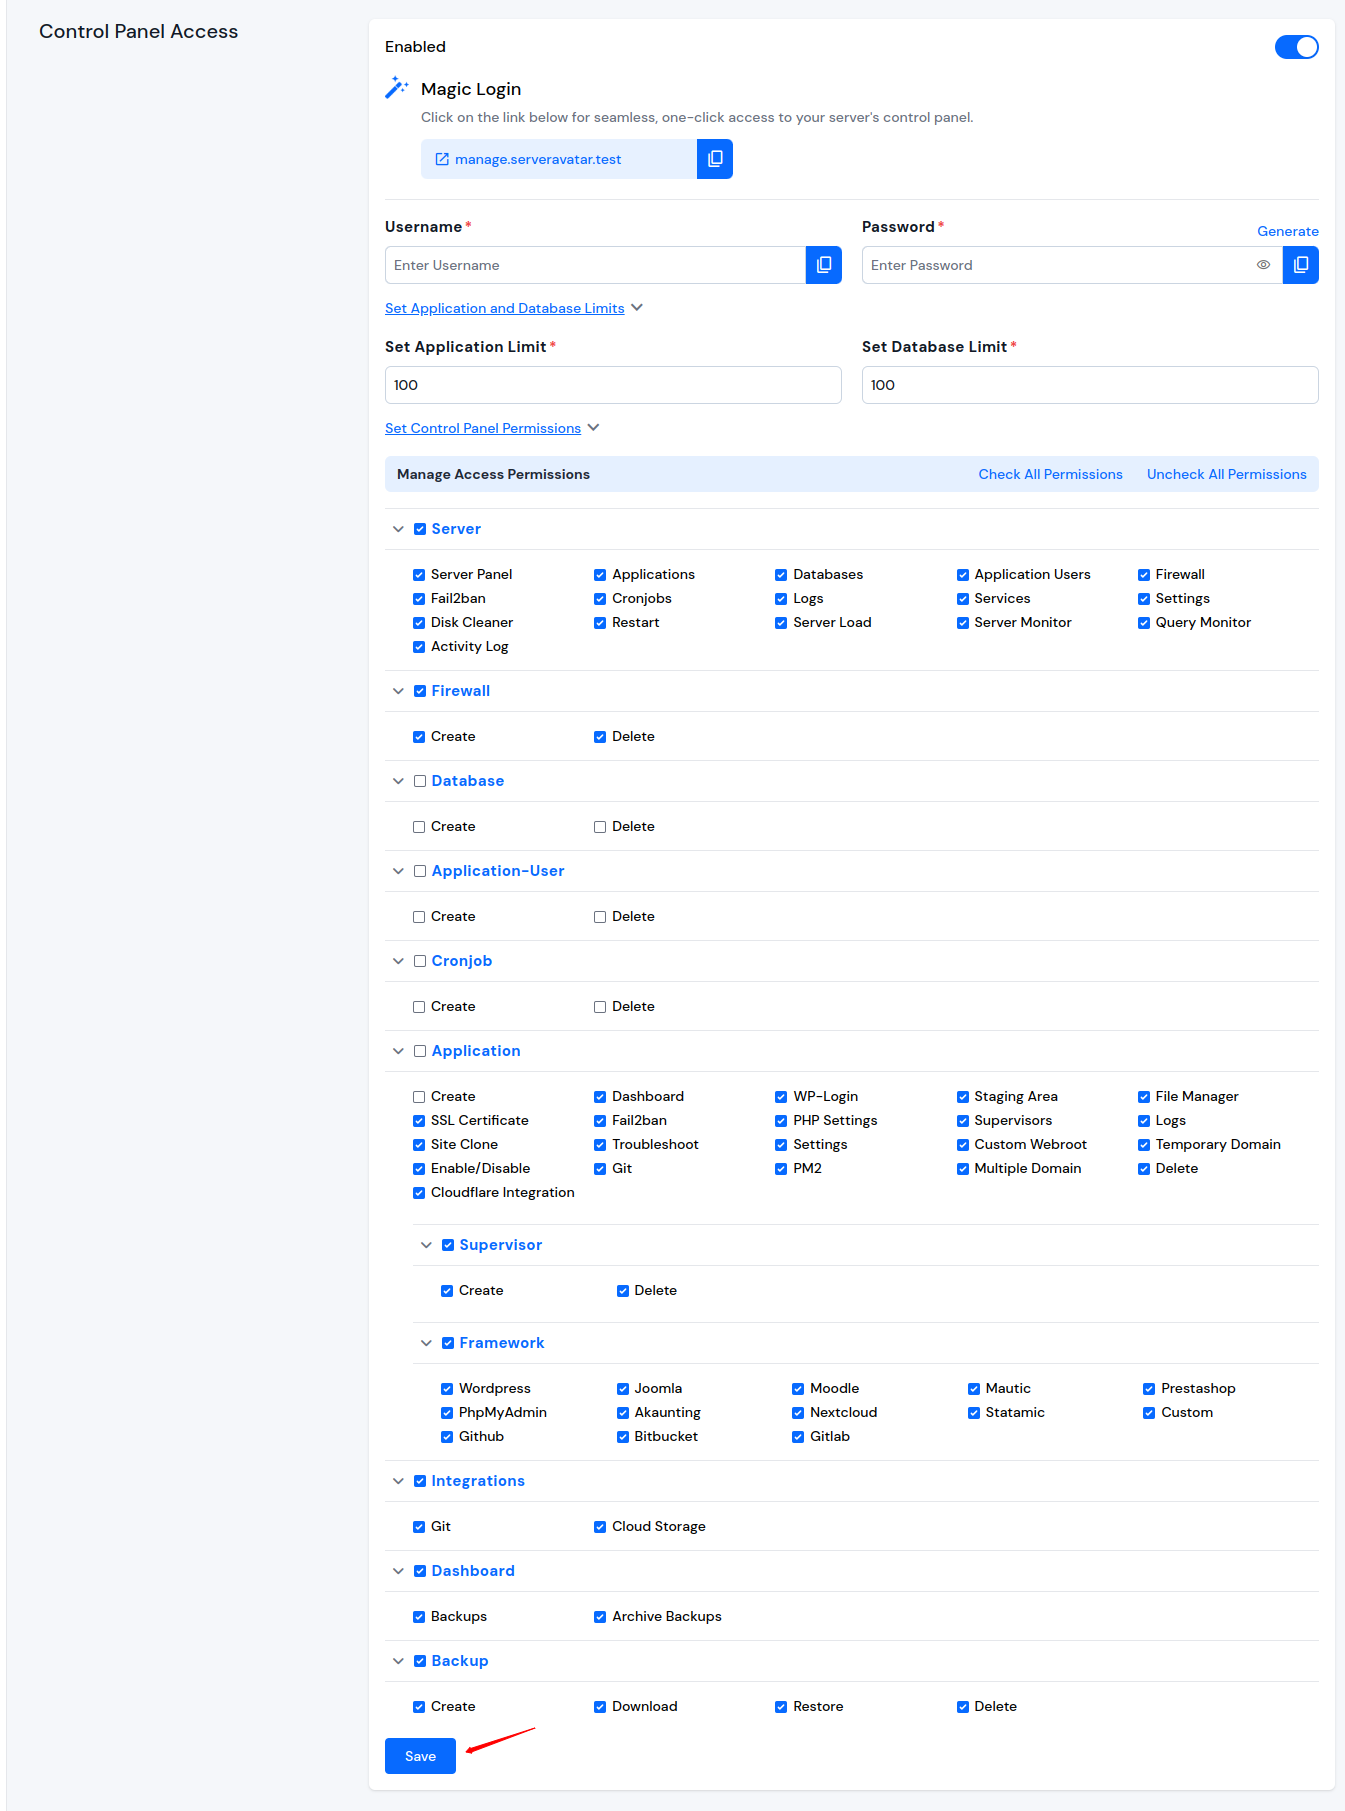
You can cap how many applications and databases can be created from the Control Panel. Click Set Application and Database Limits to show:
- Set Application Limit – Maximum number of applications (e.g. websites) that can be created.
- Set Database Limit – Maximum number of databases that can be created.
Enter the values you want. This helps you control resource usage when multiple users or clients use the same server.
Control Panel permissions
You can choose what actions Control Panel users are allowed to perform. Click Set Control Panel Permissions to open the list of permissions. Select or clear the checkboxes for each permission you want to grant or revoke. By default, all permissions are selected; clear any that you do not want to allow.
Save and access the Control Panel
Step 5: Click Save to apply your username, password, limits, and permissions.
After saving, a domain link for the Control Panel appears, with a copy button. Click the link to open the Control Panel in your browser, or copy it to share with users. Log in using the Username and Password you set.
If you need to change the password, limits, or permissions later, return to Settings -> Control Panel on the same server, update the values, and click Save again.