Tags
A tagging system in servers allows you to categorize and organize your servers efficiently by assigning custom labels. By assigning tags, you can easily filter and manage your servers based on different attributes such as environment, usage, or team.
There are two ways to add tags in ServerAvatar: from the Servers List and from the Server Panel.
Method 1: Adding Tags from the Servers List
Step 1: Log in to your ServerAvatar Account.
Step 2: Click on Servers in the left-hand sidebar of the Dashboard.

Step 3: You will see your Servers list. To add a tag, simply click on the Add Tag button.

Step 4: A popup will appear with a tags dropdown menu. Select a tag from the dropdown or Enter a custom tag and press Enter to add it.
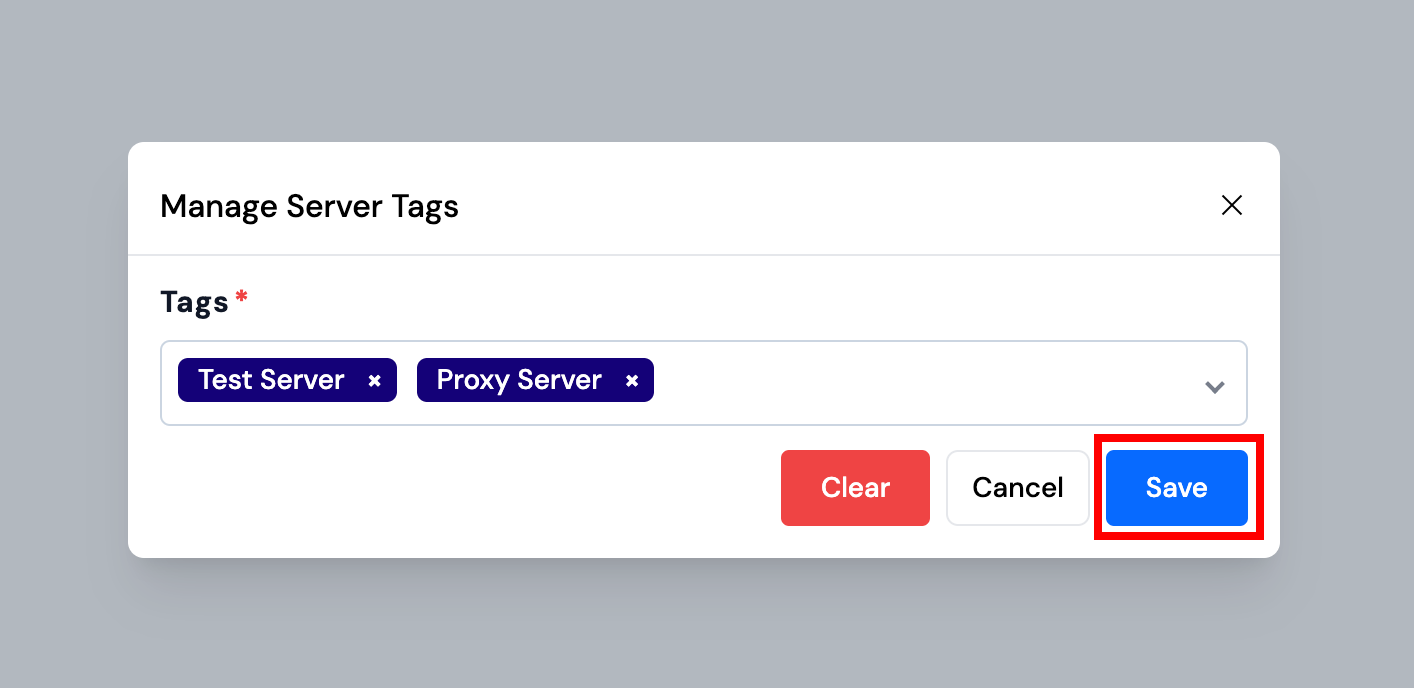
Step 5: Click the Save button to apply the tags.
The selected tags will now appear under the server name in the List.

You can also filter servers according to tags from the Servers List.

Method 2: Adding Tags from the Server Panel
Step 1: Navigate to the Server Panel by selecting a server from the Servers List.
Step 2: Locate the Tag section in the server overview. Click on the Add button.

Step 3: A popup will appear with a tags dropdown menu.
Step 4: Click the Save button to apply the tags.

Edit/Clear Tags
Step 1: An edit icon will appear next to the server tags in both the Servers List and Server Panel.

Step 2: Clicking on this icon will open the tag management popup. From this popup, you can:
- Clear all tags.
- Update existing tags.
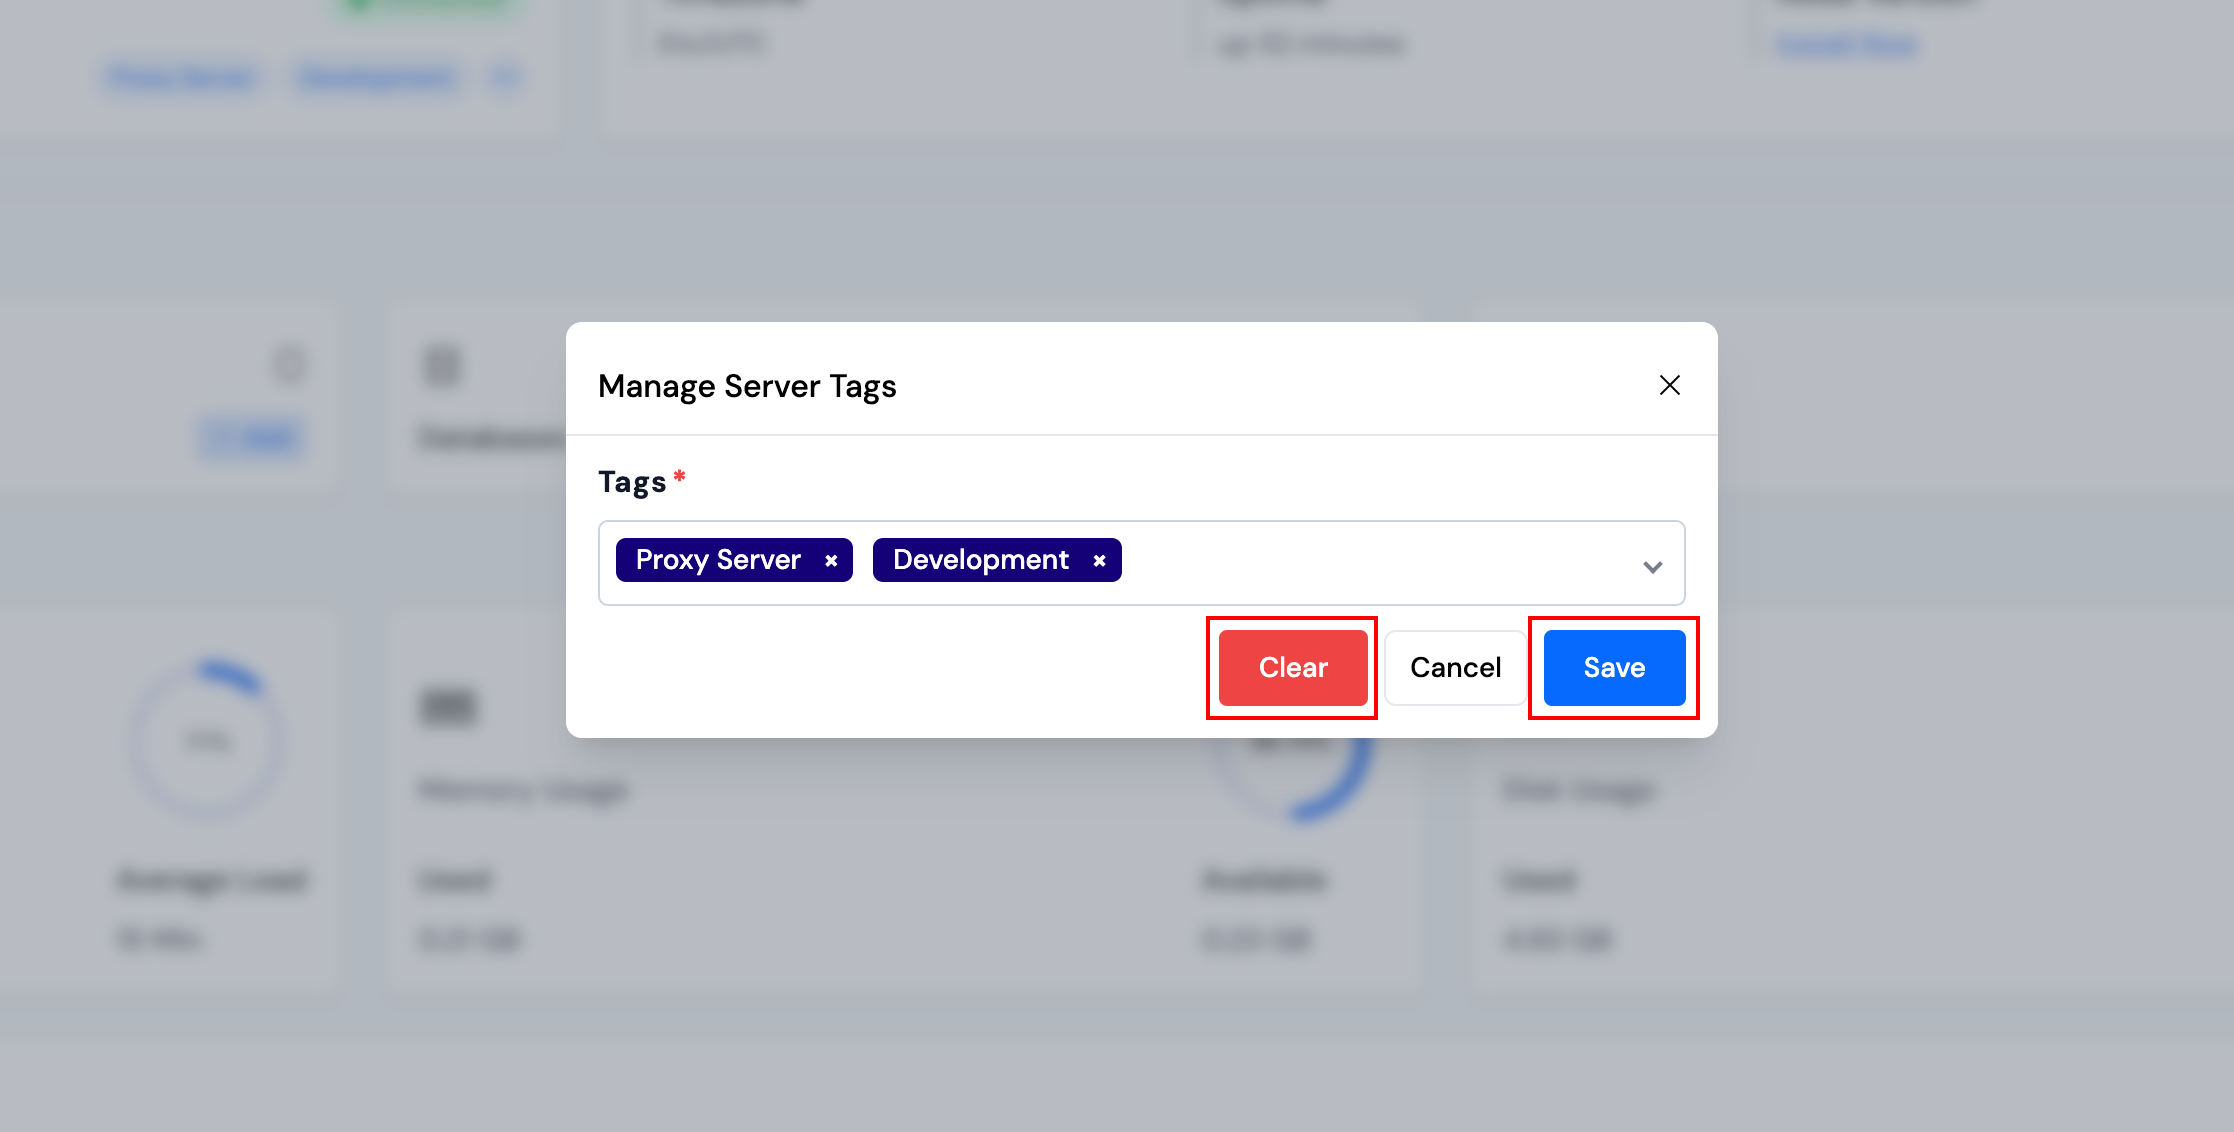
Save changes to apply the updates.