Cloud Platforms
This documentation provides basic information about integrating popular cloud platforms like Amazon Lightsail, DigitalOcean, Hetzner, Vultr and Linode into your self hosted whitelabel. The integration allows your users to create and manage servers directly to these providers.
The providers you add here, along with the plans you set for each provider, will be the only ones visible to your users when they connect a server.
DigitalOcean
With DigitalOcean integration, your users can easily create and connect the servers in one step. In this tutorial, I will show you how to integrate your DigitalOcean account with your self hosted panel.
If you have a fresh DigitalOcean account, please create a test server in that account first. Once some actions are performed on the account—DigitalOcean enables API access. This is required because DigitalOcean restricts API access on new accounts until initial activity has been registered.
You can delete the server after the API has been added successfully.
Steps to Create an Access Token
Step 1: Login to your DigitalOcean account.
Step 2: Navigate to the API Section
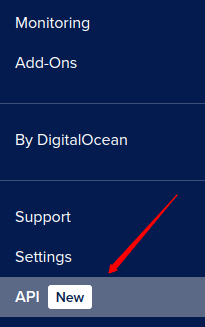
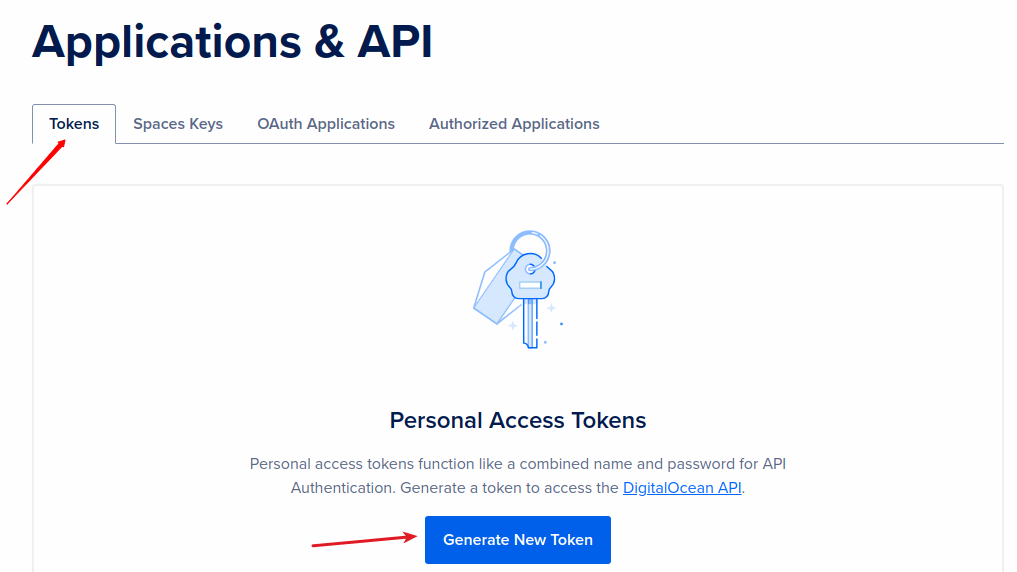
Step 3: Create a New Token
- On the API page, you’ll see a section titled Personal Access Tokens.
- Click the Generate New Token button.
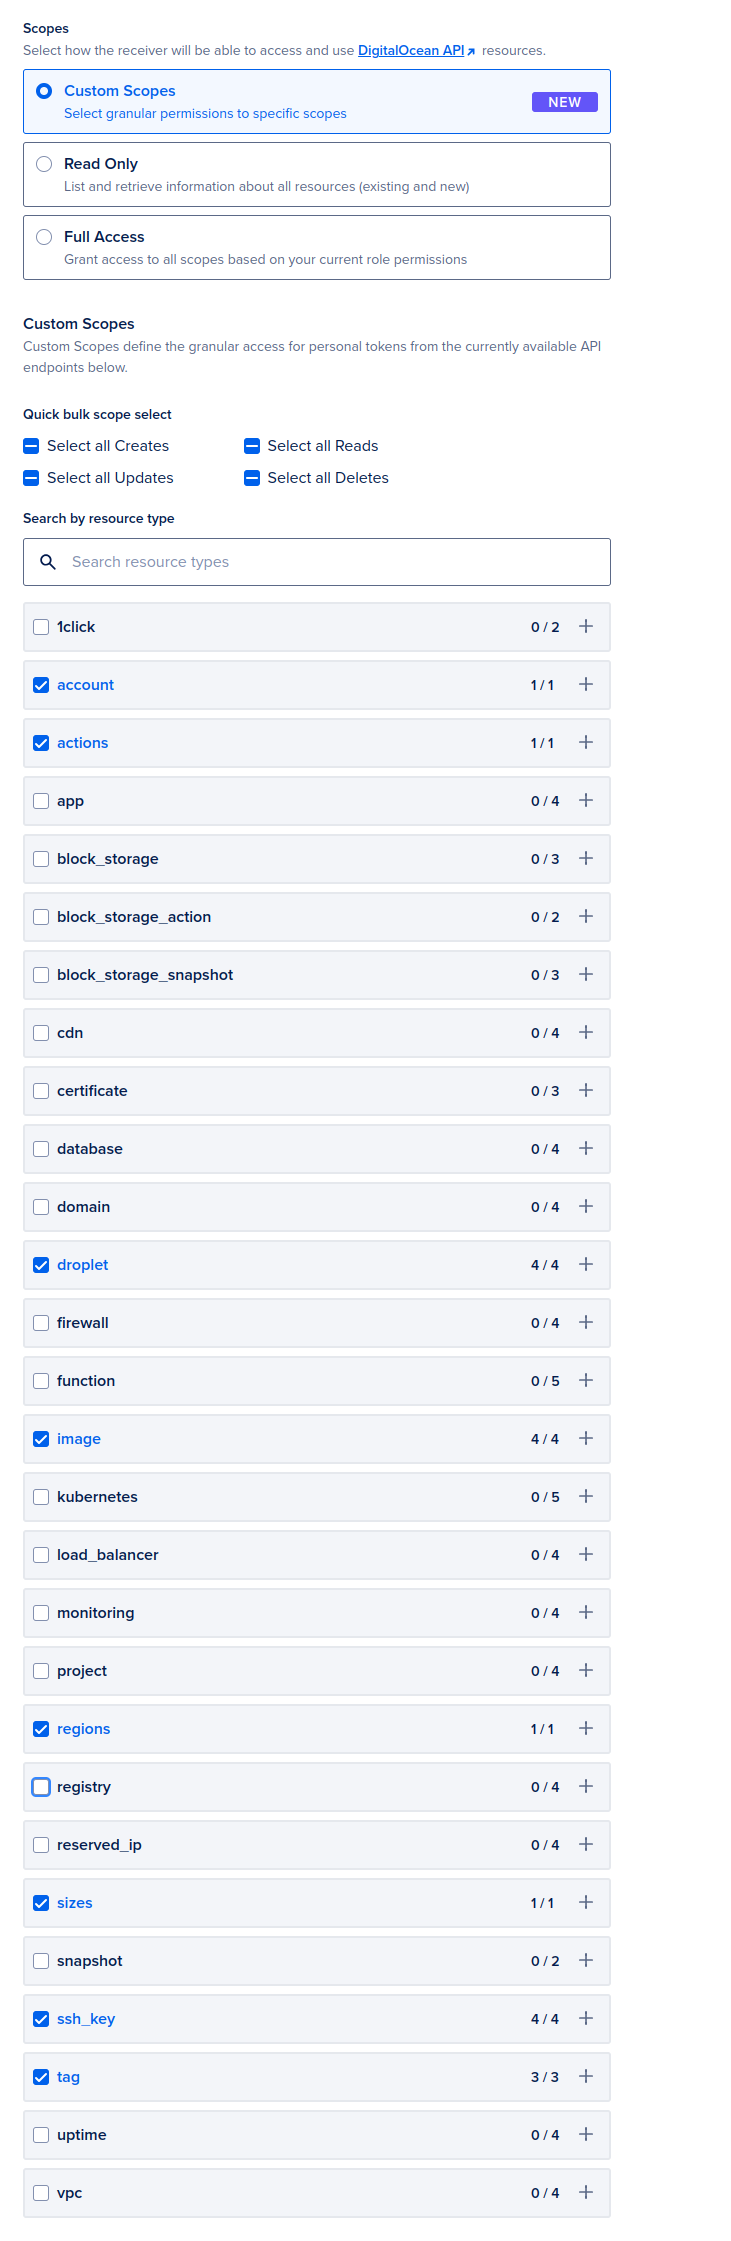
Step 4: Configure the Token
- Token Name: Enter a descriptive name for your token.
- Expiration: Choose the expiration duration for your token. Select No expire option.

- Scopes: Define the level of access and specific actions that the token is permitted to perform. Select Custom Scopes and then select permissions shows in below image.
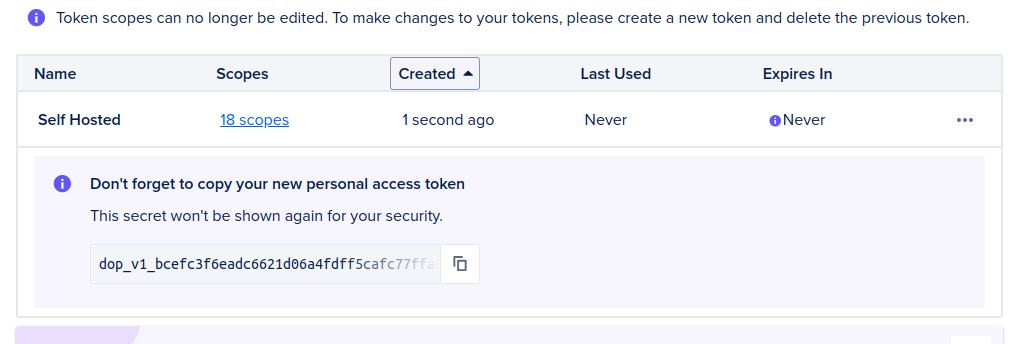
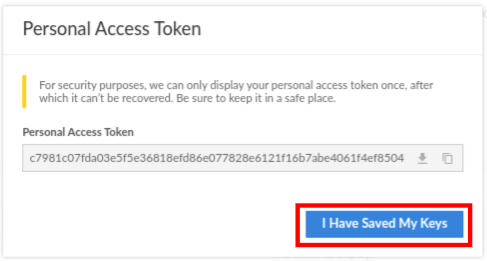
Step 5: Generate and Secure the Token
- Click the Generate Token button to create your new access token.
Now, you can see your access token in the table. Copy the generated token.
Integrate DigitalOcean into your Self Hosted Panel
Step 1: First, log in to the Self Hosted panel, and go to admin side by clicking on Admin as shown in the image below.
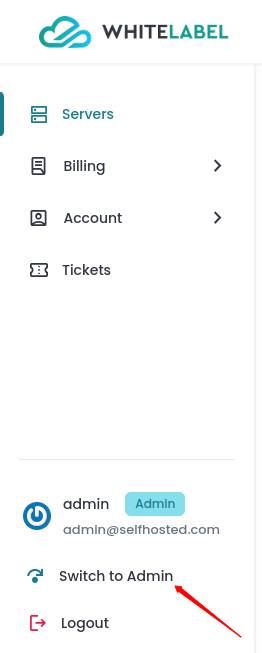
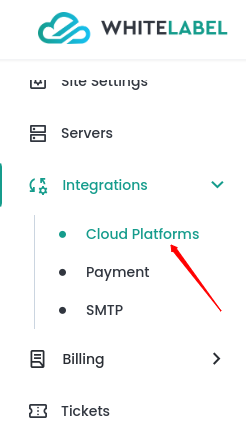
Step 2: Click on the Integrations -> Cloud Platforms option from the left side panel.
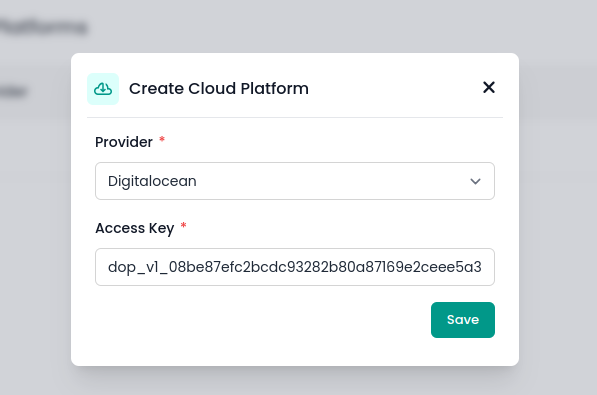
Step 3: Click on the + Add button.

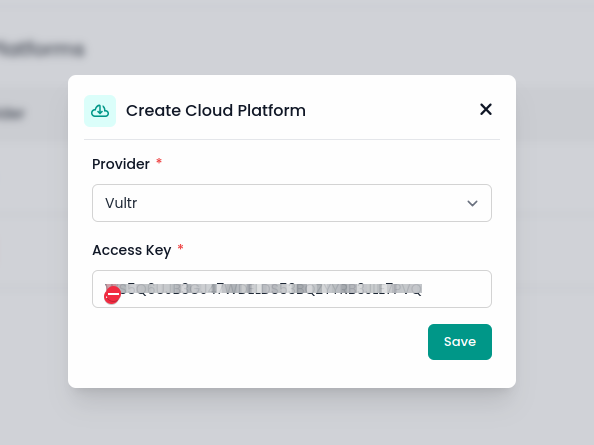
Step 4: A popup will appear. Select DigitalOcean from the provider dropdown, enter the Access Key generated from the DigitalOcean panel, and click on the Save button.
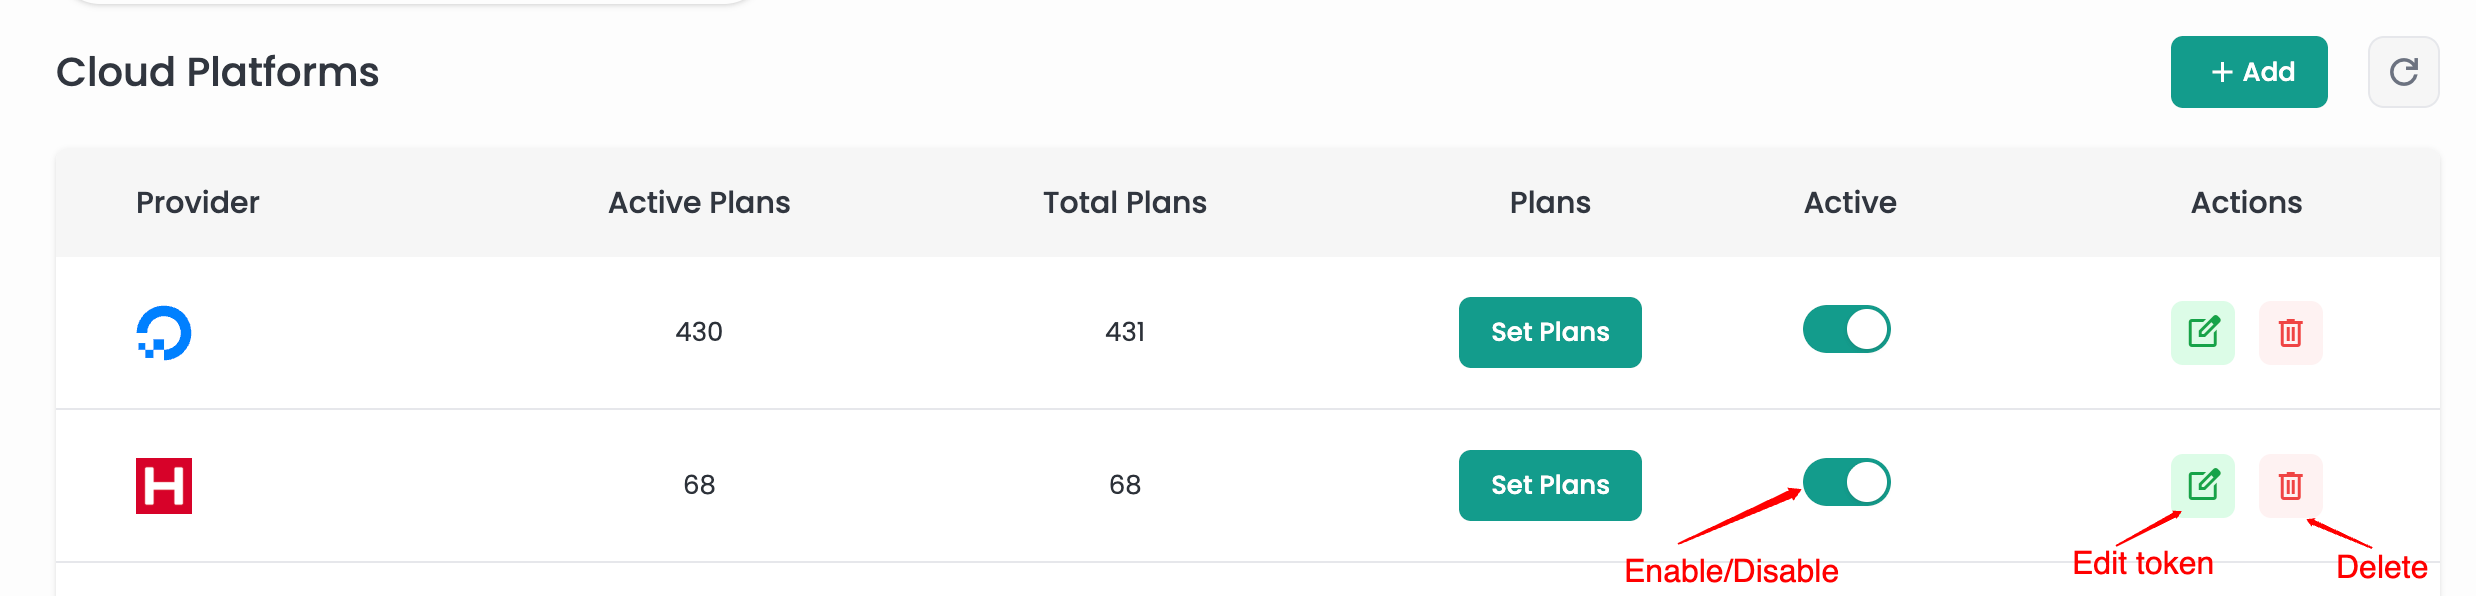
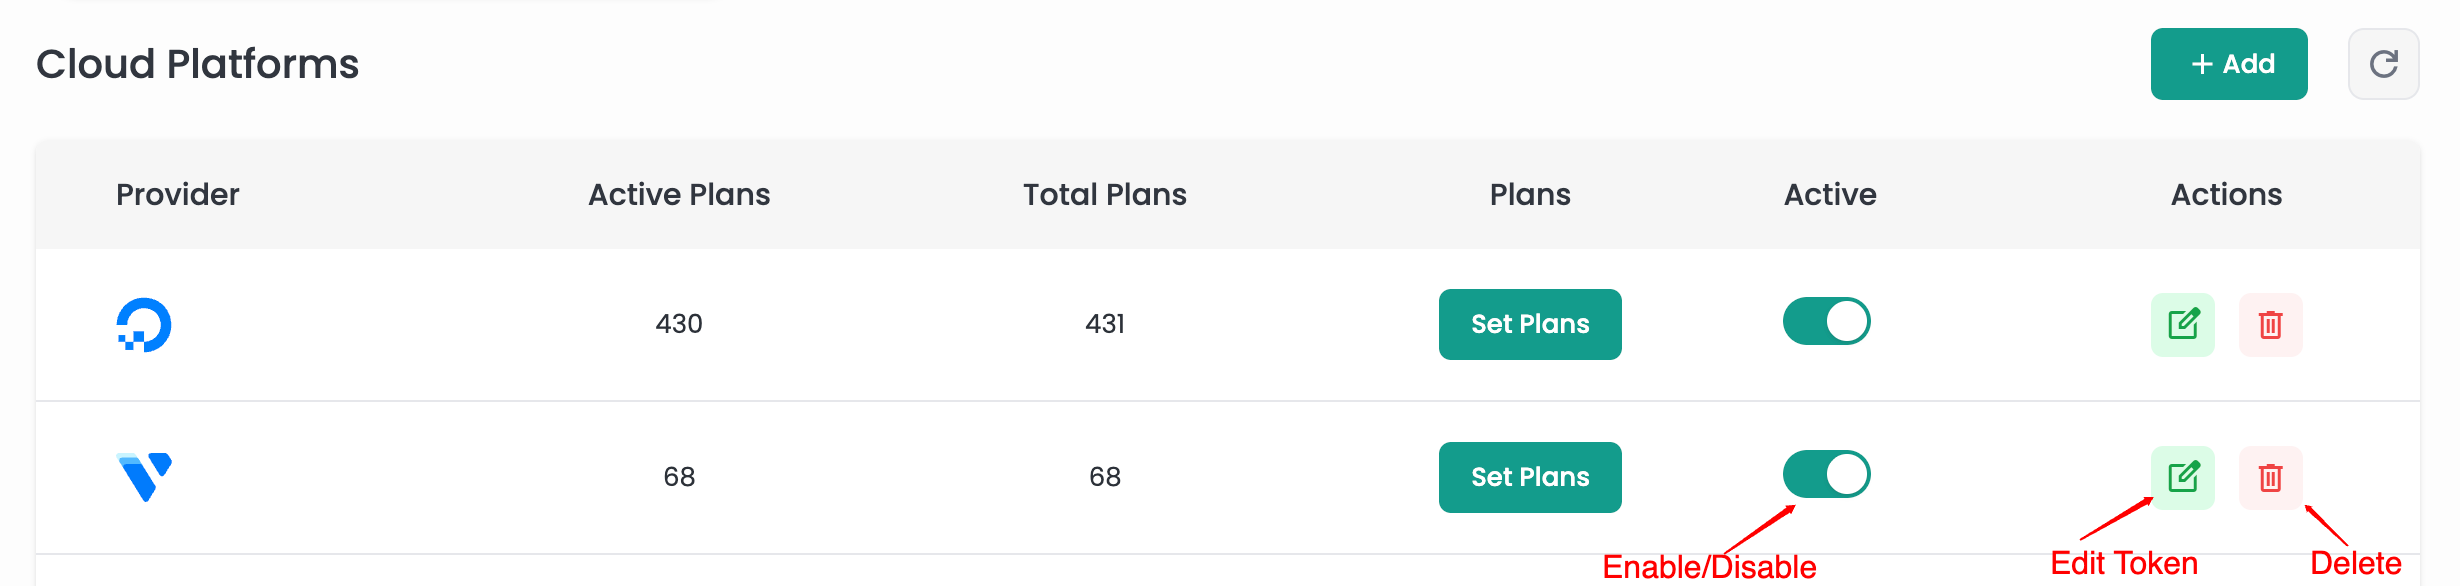
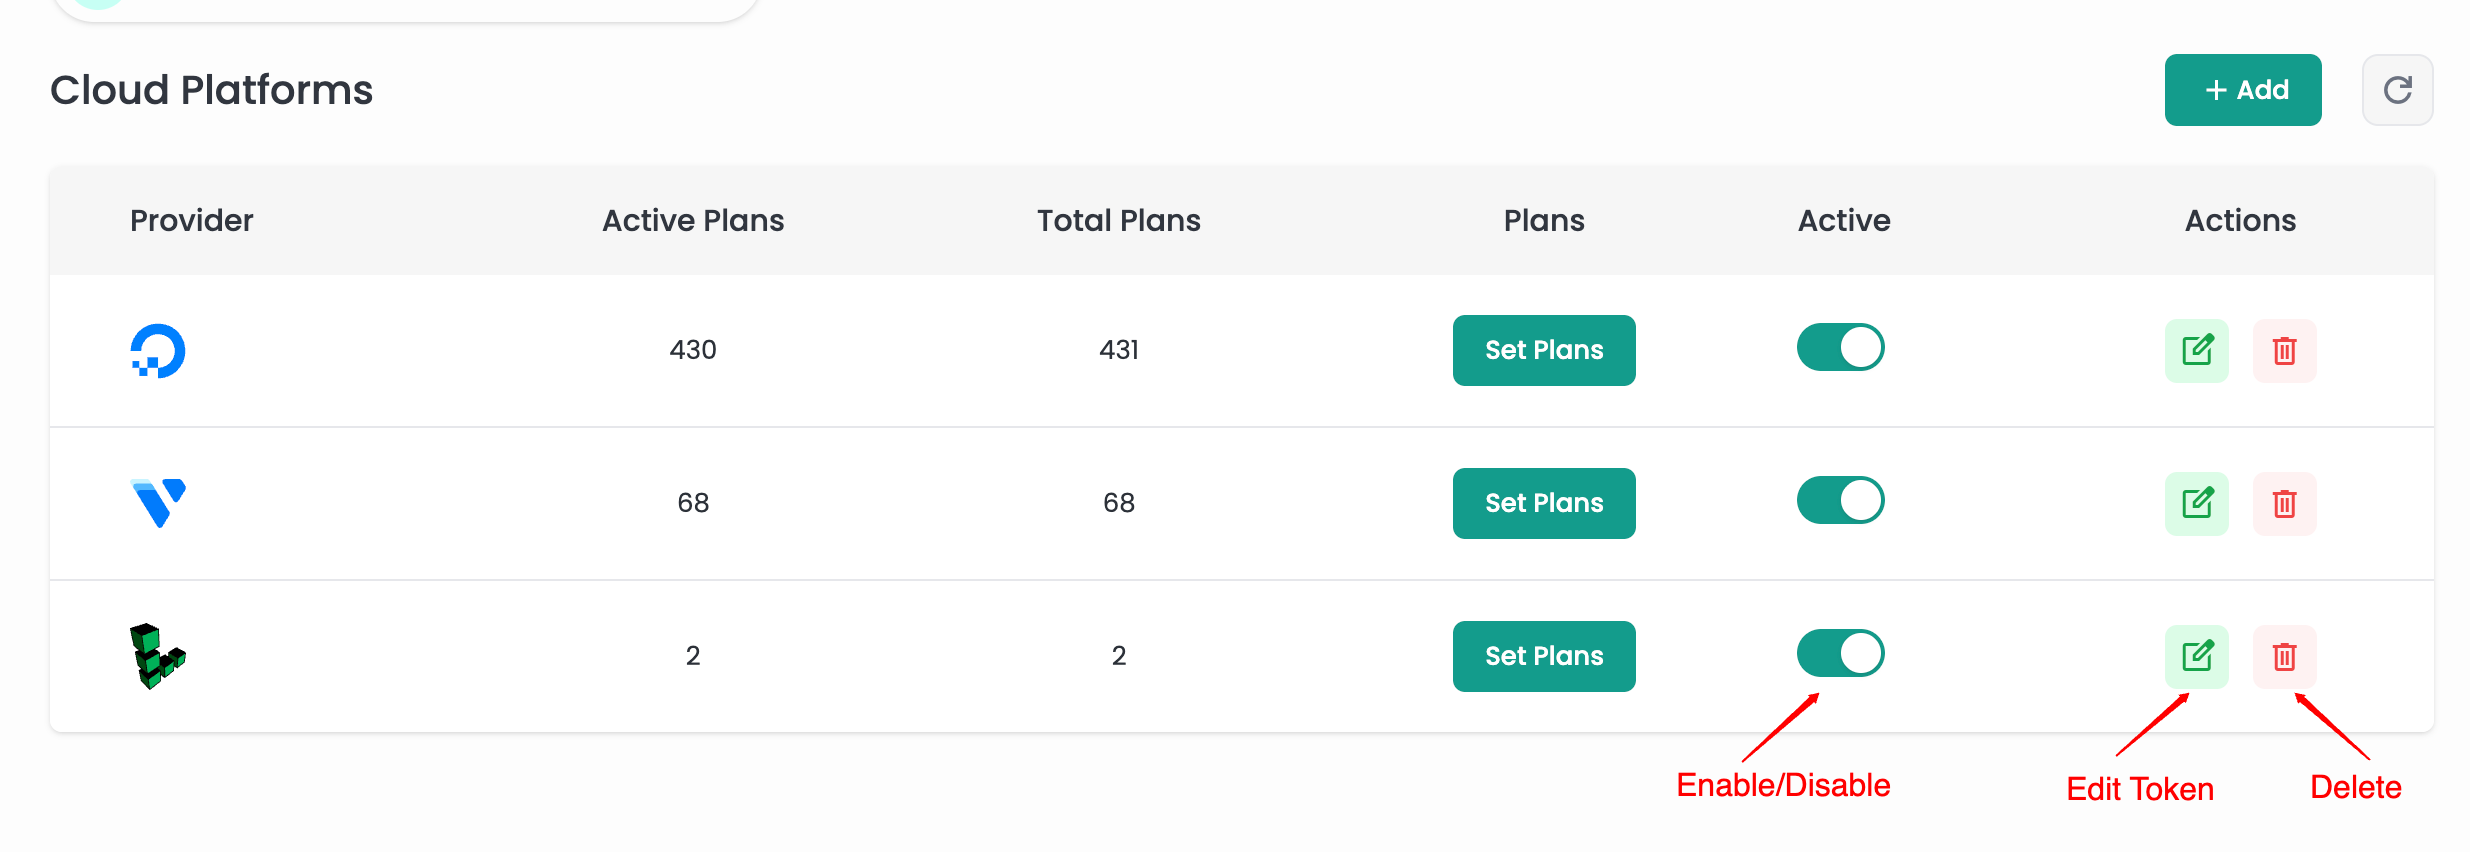
You can Edit or Delete this token later.
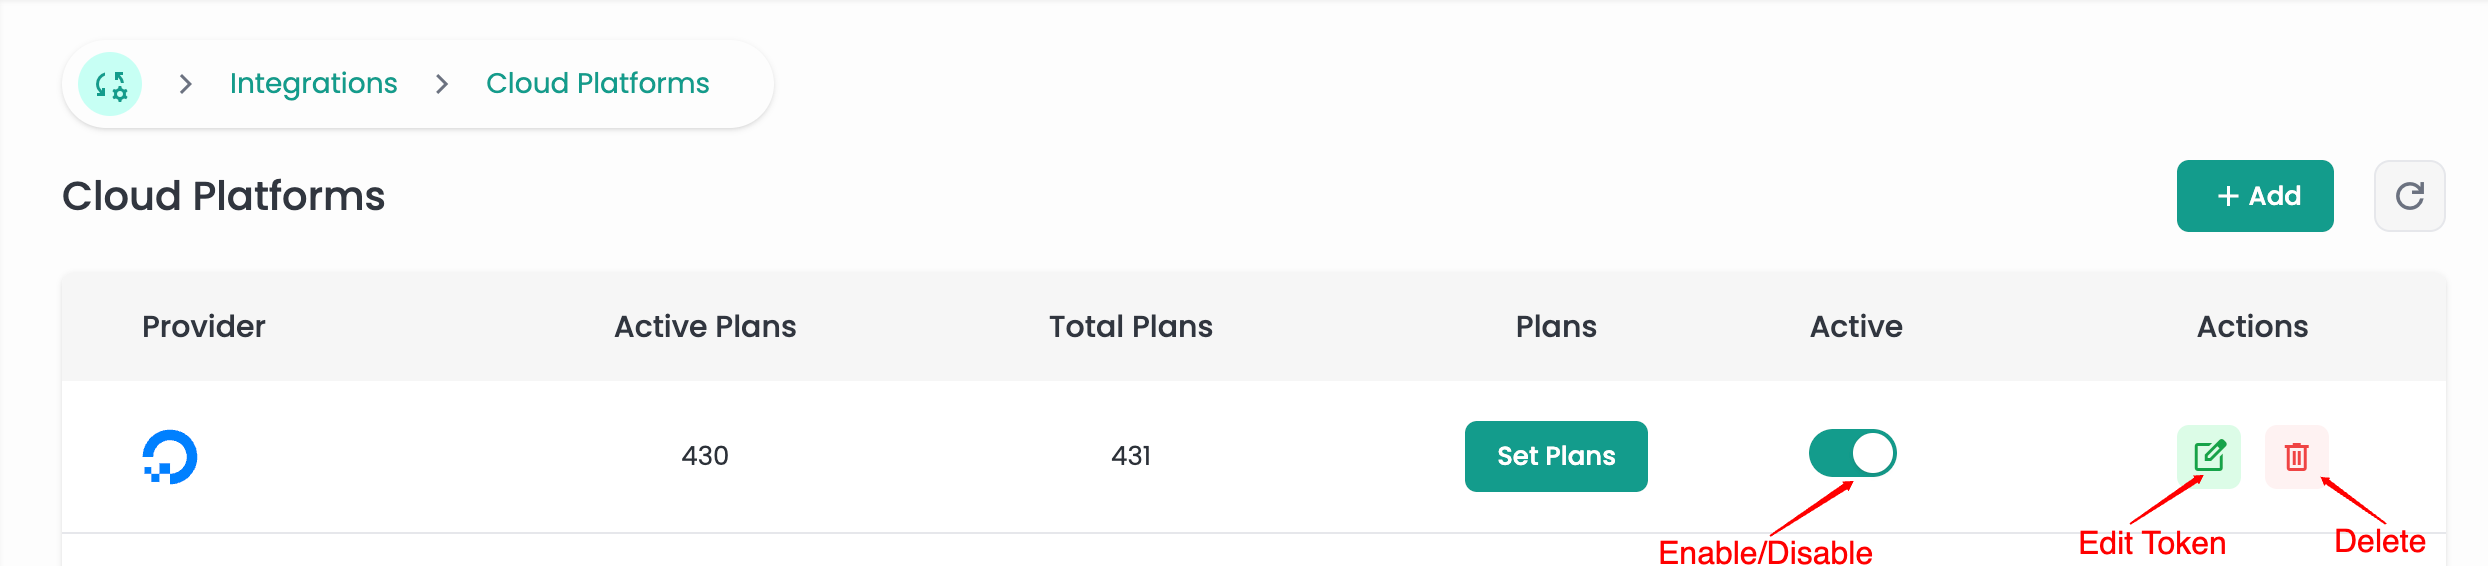
You can enable or disable a provider if you don't want it to be visible to your users. If you disable a provider using the Active column switch, DigitalOcean will not be shown to your users when they create a server.
To set Plans for Digitalocean, see the Set Plans Section.
Hetzner
Hetzner is a reliable web hosting provider with various hosting services: web hosting, dedicated servers, colocation, and custom hosting solutions.
Steps to Create an Access Token
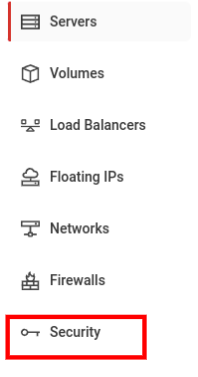
Step 1: Login in your Hetzner account. Navigate to Your Project → Security.
Step 2: Click API Tokens section and click on Generate API Token button.

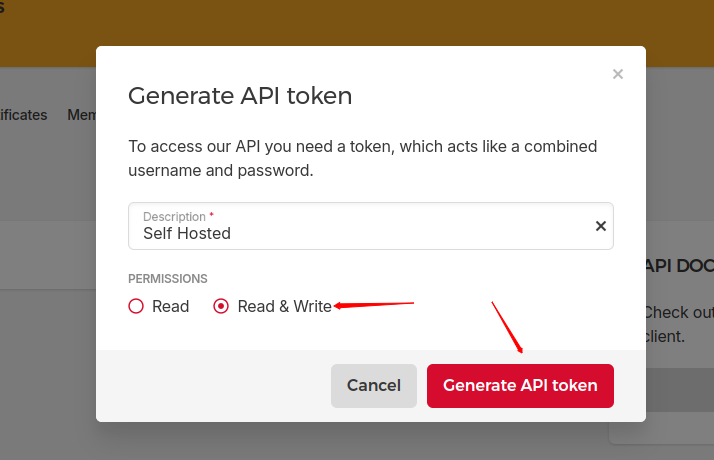
Step 3: Enter Description, and set Read & Write Permission and click on Generate API Token button.
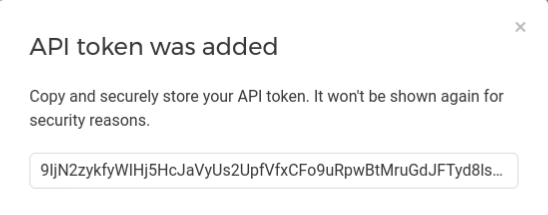
Step 4: Copy your API token.
Integrate Hetzner into your Self Hosted Panel
Step 1: First, log in to the Self Hosted panel, and go to admin side by clicking on Admin as shown in the image below.
Step 2: Click on the Integrations -> Cloud Platforms option from the left side panel.
Step 3: Click on the + Add button.
Step 4: A popup will appear. Select Hetzner from the provider dropdown, enter the Access Key generated from the Hetzner panel, and click on the Save button.

You can Edit or Delete this token later.
You can enable or disable a provider if you don't want it to be visible to your users. If you disable a provider using the Active column switch, Hetzner will not be shown to your users when they create a server.
To set Plans for Hetzner, see the Set Plans Section.
Vultr
Vultr is a very popular cloud platform, just like AWS, Google Cloud, and others. But it is very easy to use and has a simple interface.
Steps to Create an Access Token
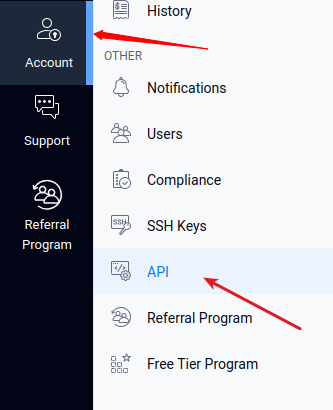
Step 1: Click on Account in the left sidebar and click on API section.
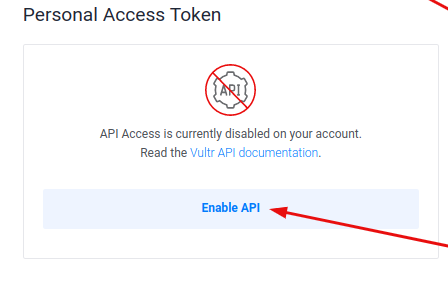
Step 2: Click on the Enable API button.
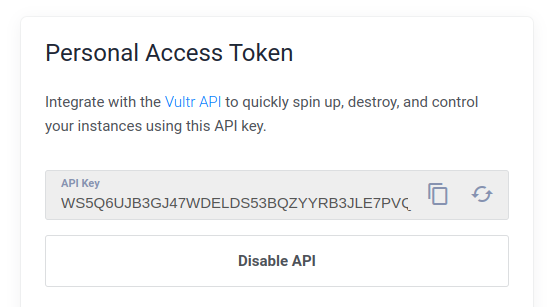
Step 3: You can copy or refresh your API key.
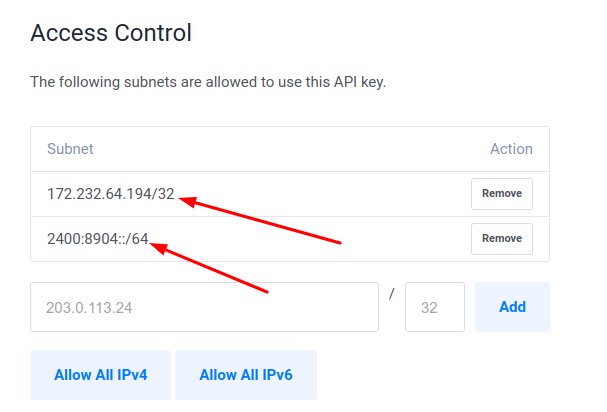
Step 4: Add below two ip in access control.
- **ipv6 : **
2400:8904::f03c:93ff:fe90:9c3e/64 - **ipv4 : **
172.232.64.194/32
Integrate Vultr into your Self Hosted Panel
Step 1: First, log in to the Self Hosted panel, and go to admin side by clicking on Admin as shown in the image below.
Step 2: Click on the Integrations -> Cloud Platforms option from the left side panel.
Step 3: Click on the + Add button.
Step 4: A popup will appear. Select Vultr from the provider dropdown, enter the Access Key generated from the Vultr panel, and click on the Save button.
You can Edit or Delete this token later.
You can enable or disable a provider if you don't want it to be visible to your users. If you disable a provider using the Active column switch, Vultr will not be shown to your users when they create a server.
To set Plans for Vultr, see the Set Plans Section.
Linode
Linode is a reliable cloud hosting company that mainly focuses on providing Linux-based cloud solutions enabling you to create and deploy servers through a web interface.
Steps to Create an Access Token
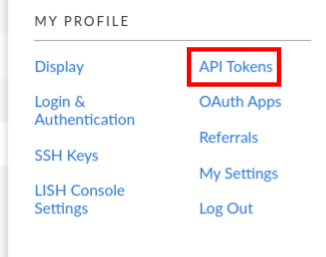
Step 1: Login to your Linode Account. Navigate to Profile & Account → API Tokens.
Step 2: Click the API Tokens section and then click on Create a Personal Access Token button.

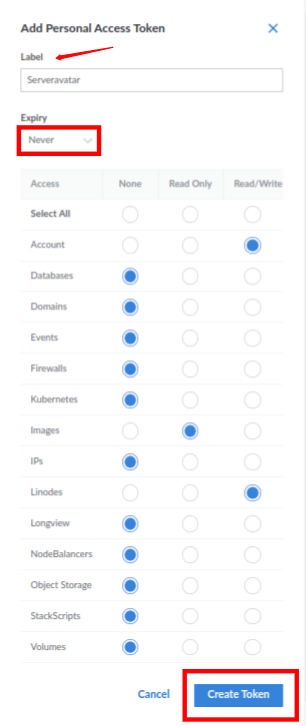
Step 3: Enter a Label, set Expiry as Never, set Permission as mentioned below, and click on the Create Token button.
Step 4: You can Copy your API key and click on the I have Saved My Keys button.
Integrate Linode into your Self Hosted Panel
Step 1: First, log in to the Self Hosted panel, and go to admin side by clicking on Admin as shown in the image below.
Step 2: Click on the Integrations -> Cloud Platforms option from the left side panel.
Step 3: Click on the + Add button.
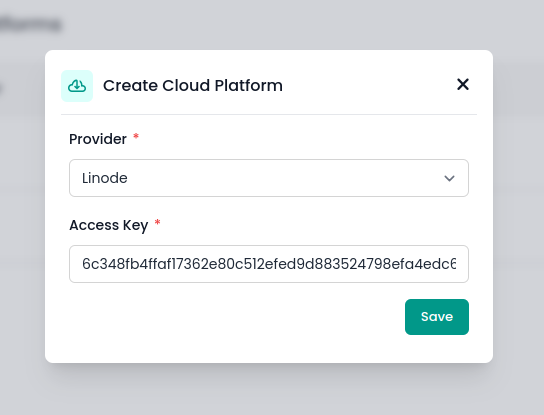
Step 4: A popup will appear. Select Linode from the provider dropdown, enter the Access Key generated from the Linode panel, and click on the Save button.
You can Edit or Delete this token later.
You can enable or disable a provider if you don't want it to be visible to your users. If you disable a provider using the Active column switch, Linode will not be shown to your users when they create a server.
To set Plans for Linode, see the Set Plans Section.
Amazon Lightsail
AWS Lightsail is an easy-to-use version of AWS EC2. If you are an expert or experienced in AWS, it is not a big deal to utilize EC2 to issue multiple types of instances. However, beginners or people who do not have much knowledge of cloud computing could easily get lost in EC2. AWS Lightsail is more like Linode, Vultr, DigitalOcean, and similar services. If you do not understand much about cloud computing, you can still use Lightsail to host your site on AWS.
Steps to Create an Access Token
Create Policy On AWS
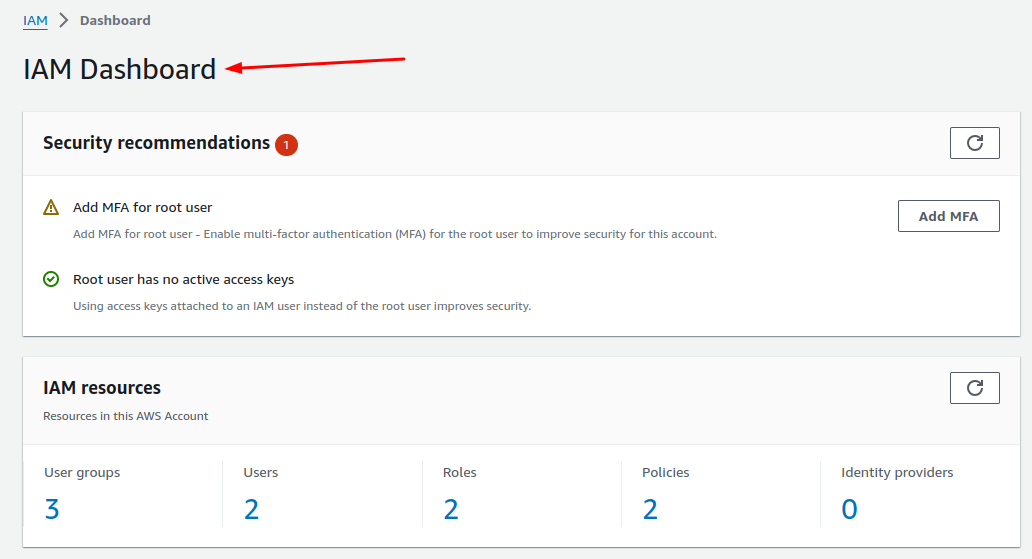
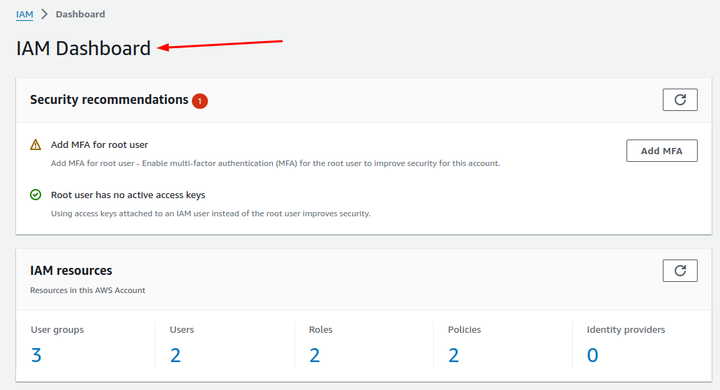
Step 1: Sign in to the IAM console.
Step 2: Click on the Policies tab on the left.
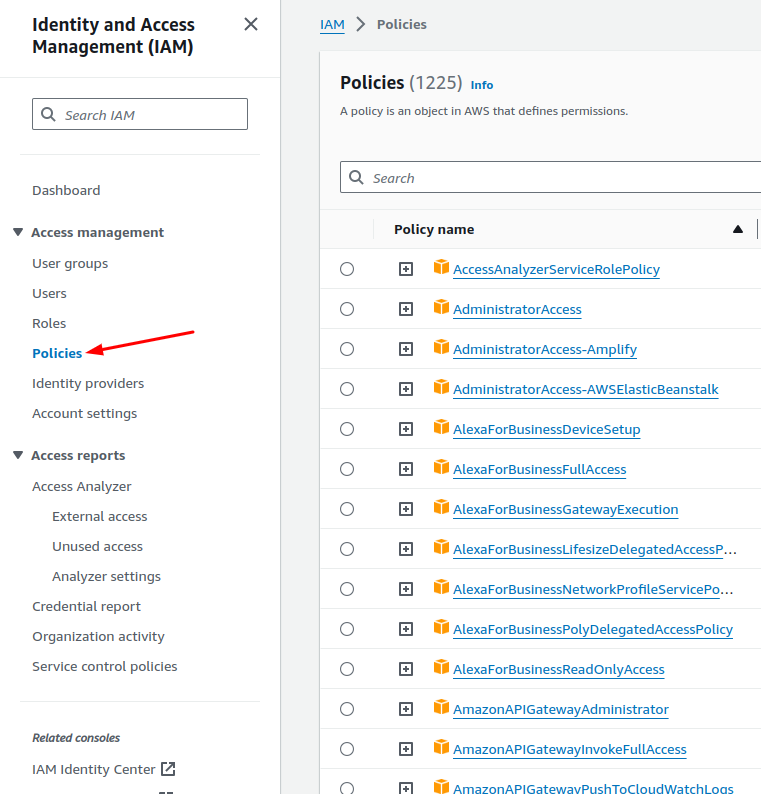
Step 3: Click on Create Policy button.

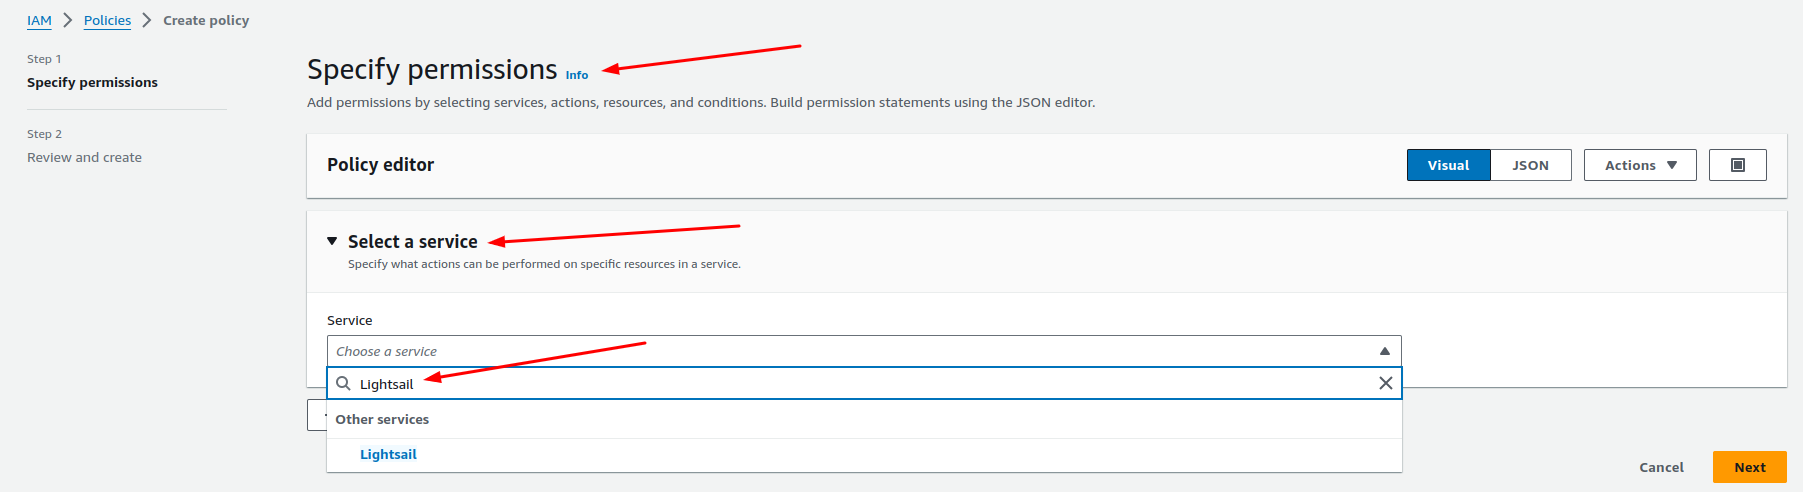
Step 4: Click on Select a service to specify the service. Search for "Lightsail" and select the Lightsail.
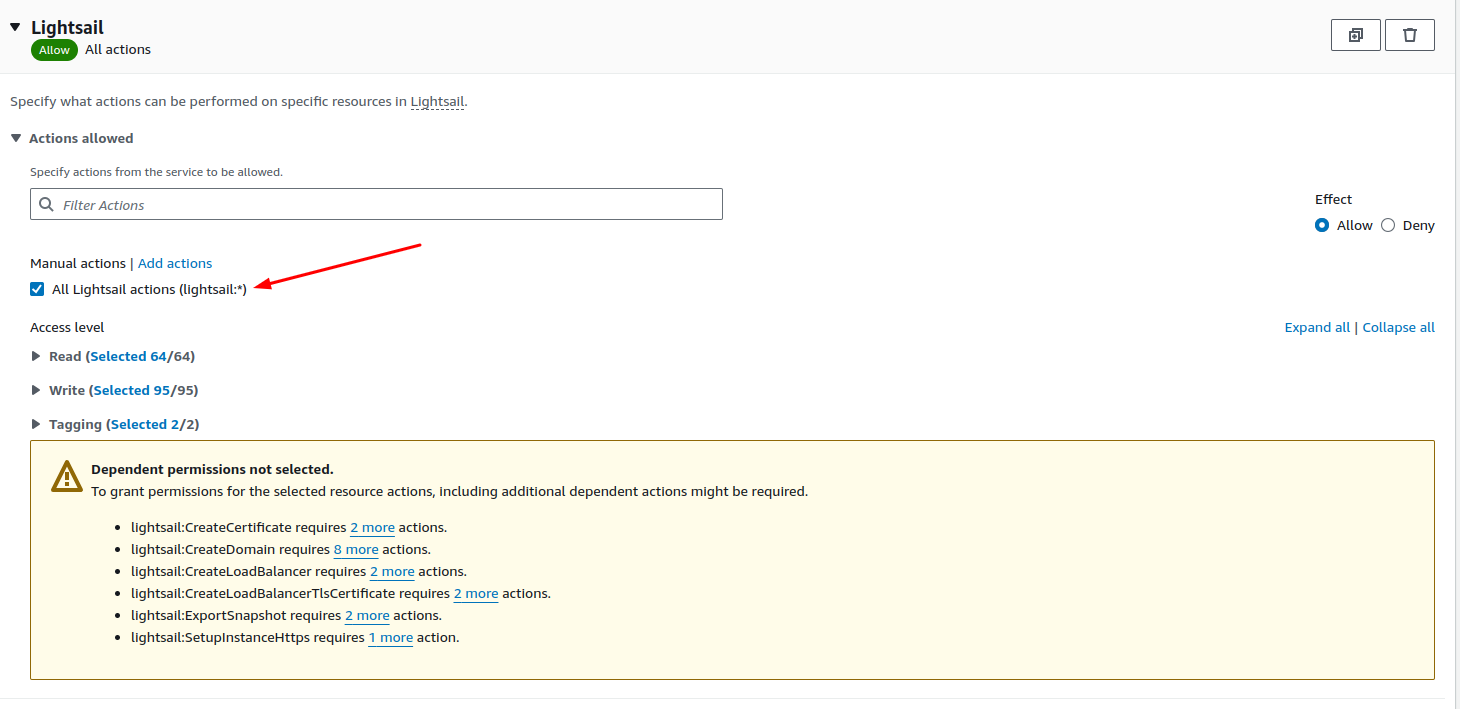
Step 5: Select the checkbox of All Lightsail actions.
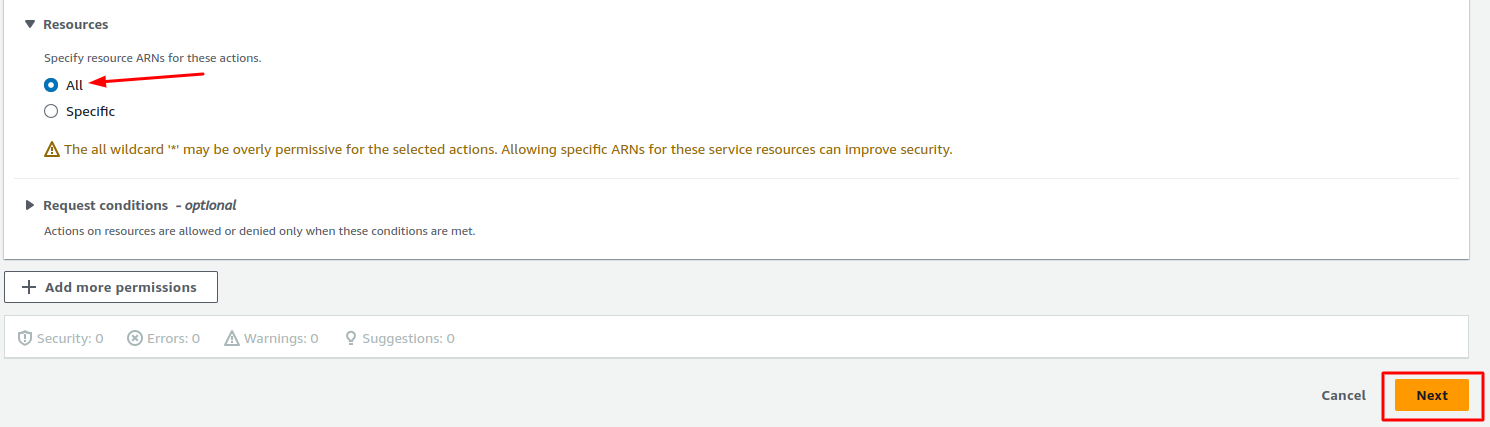
Step 6: Select the Resources tab and choose All resources. Then, Click on Next button.
Step 7: Enter Policy name and Review policy.

Step 8: Click on Create policy button and the policy will be created.

Create User On AWS
Step 1: Sign in to the IAM console.
Step 2: Go to Users tab.
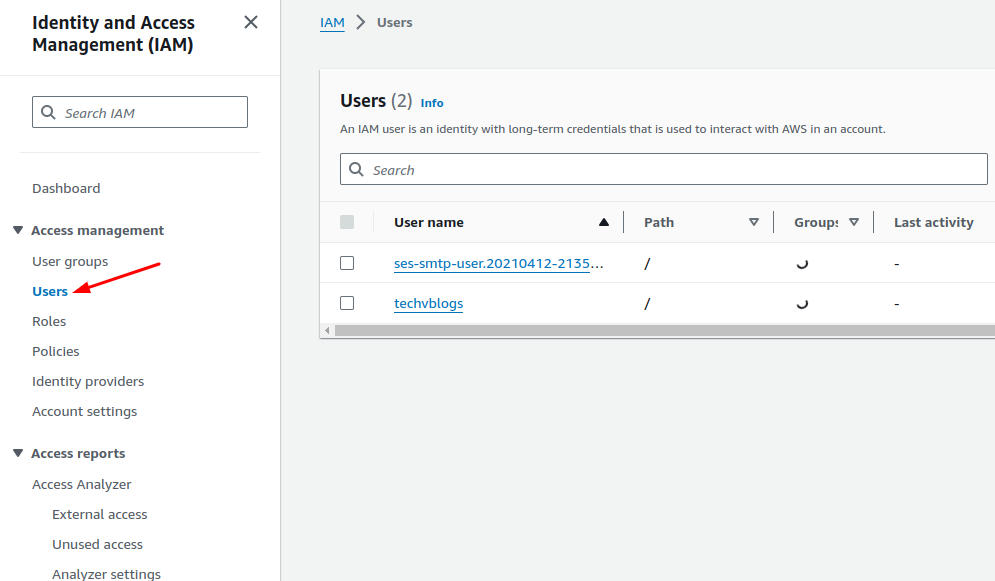
Step 3: Click on Create User.

Step 4: Enter the Username and click on the Next button.

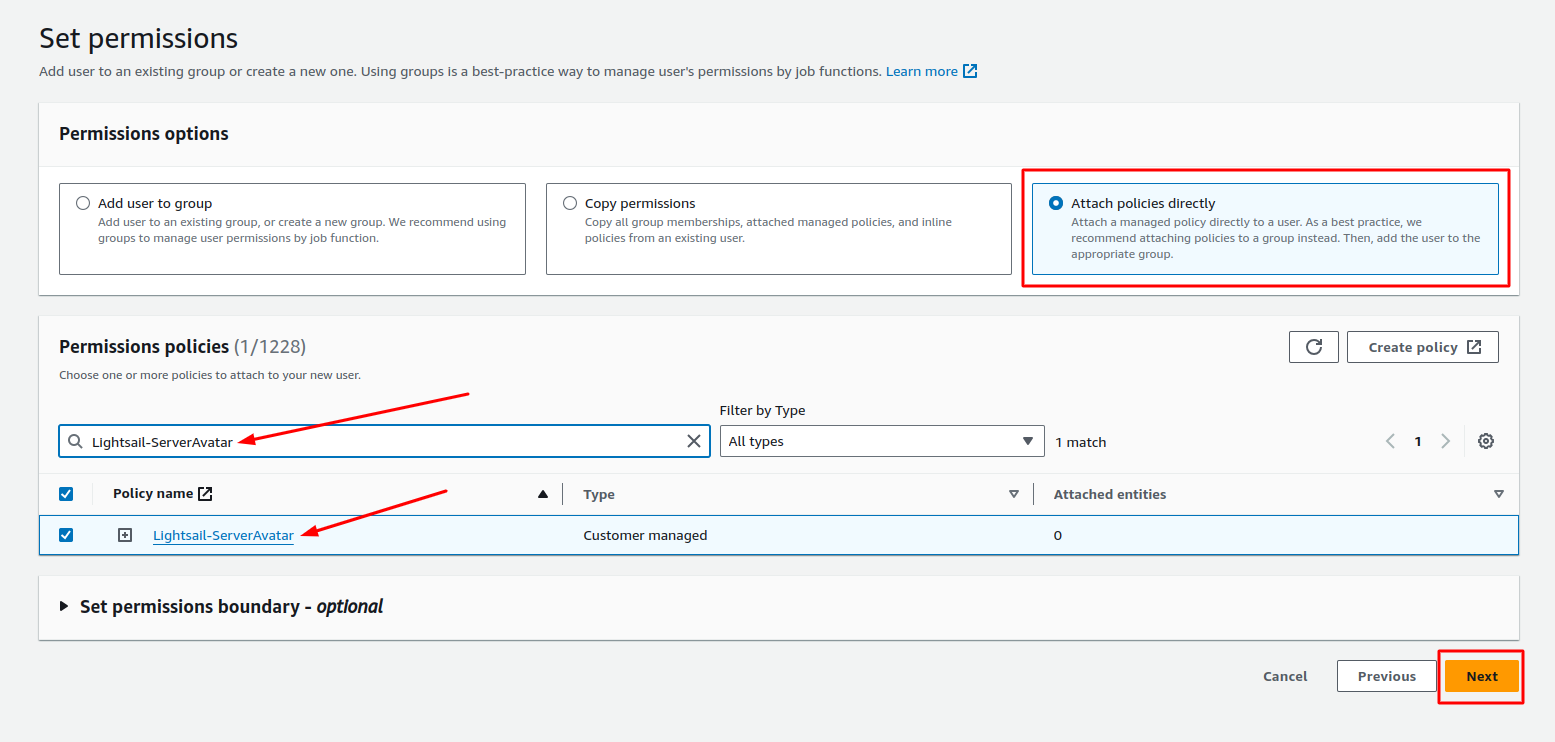
Step 5: Select Attach policies directly from the "Permissions options" and search for your specific “Policy-Name”. After selecting your policy, click on the Next button.
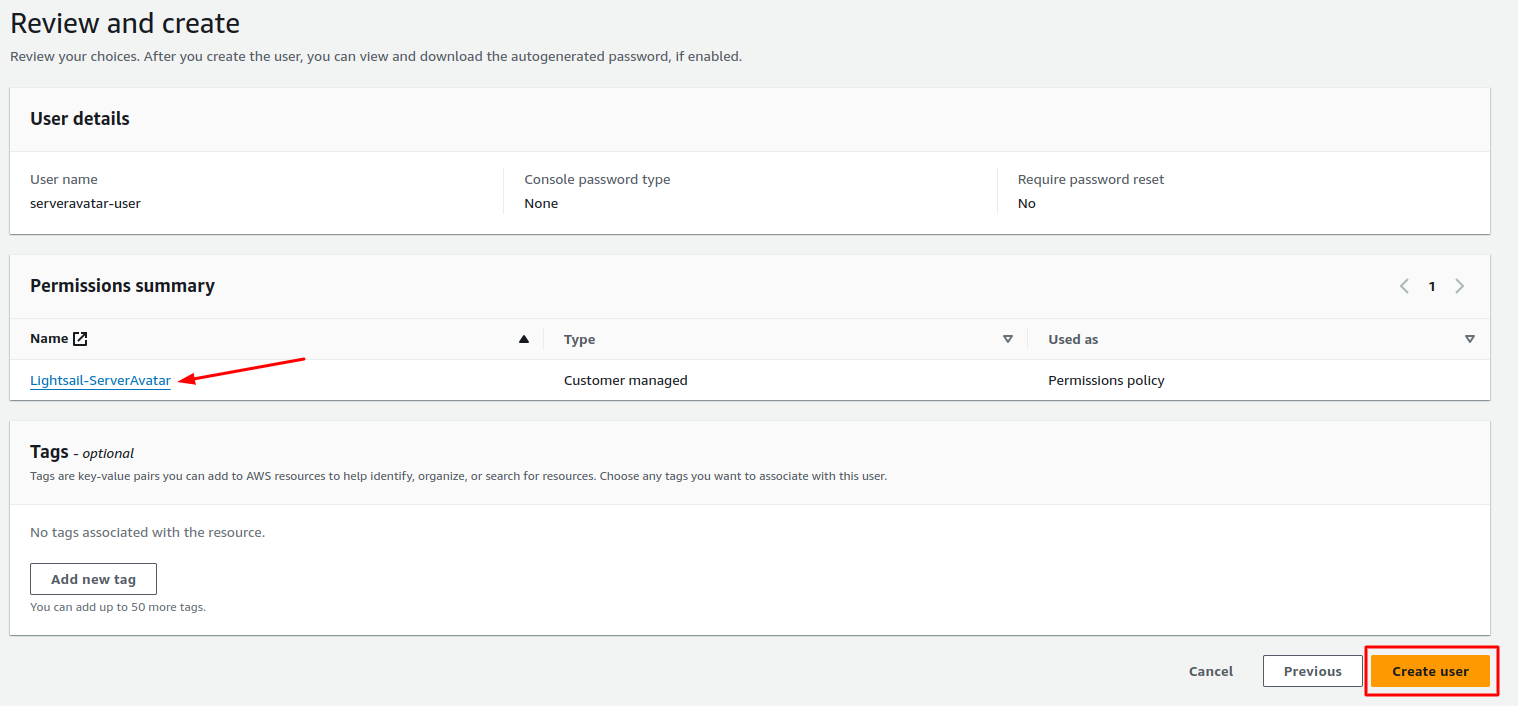
Step 6: Review your user and click on the Create user button.
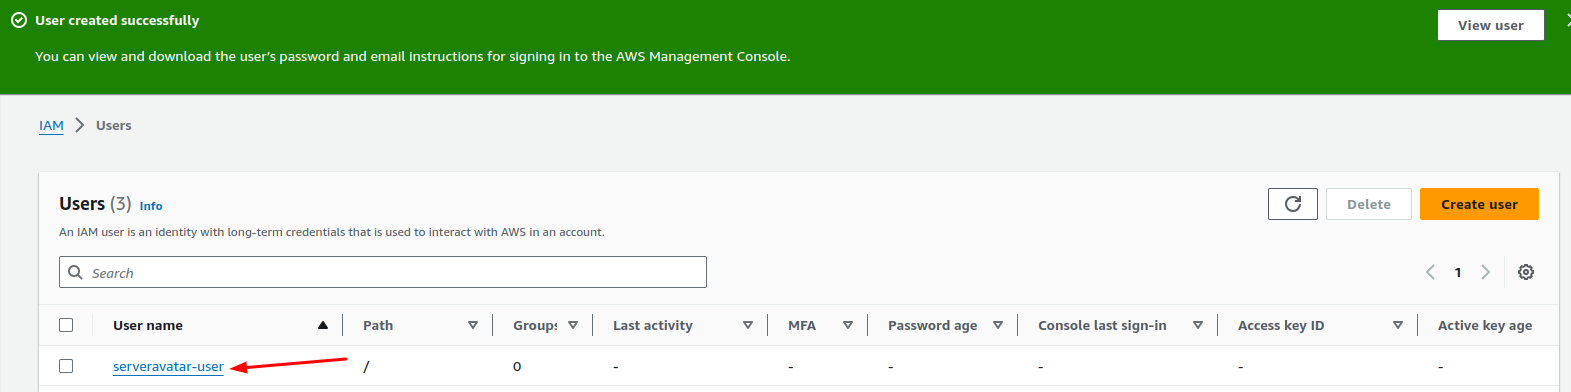
Step 7: Click on your created user.
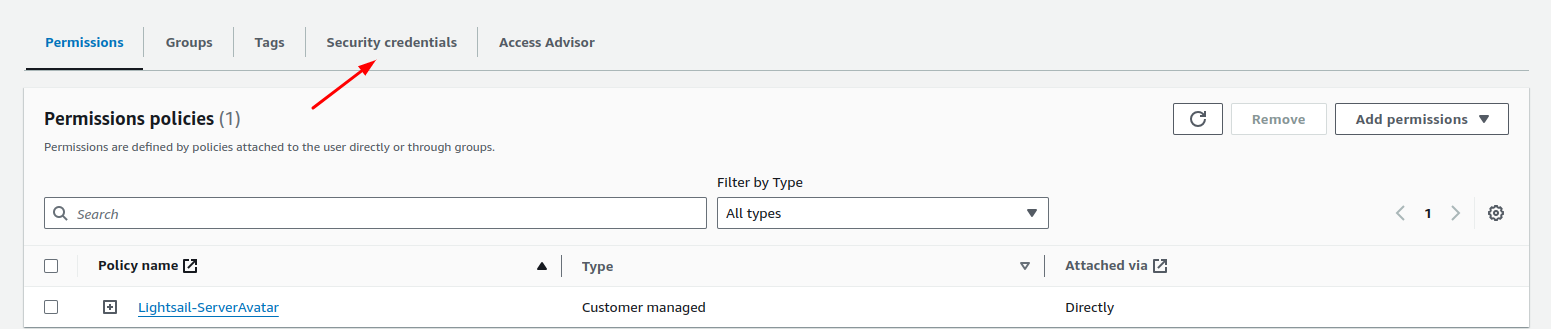
Step 8: Go to Security credentials tab.
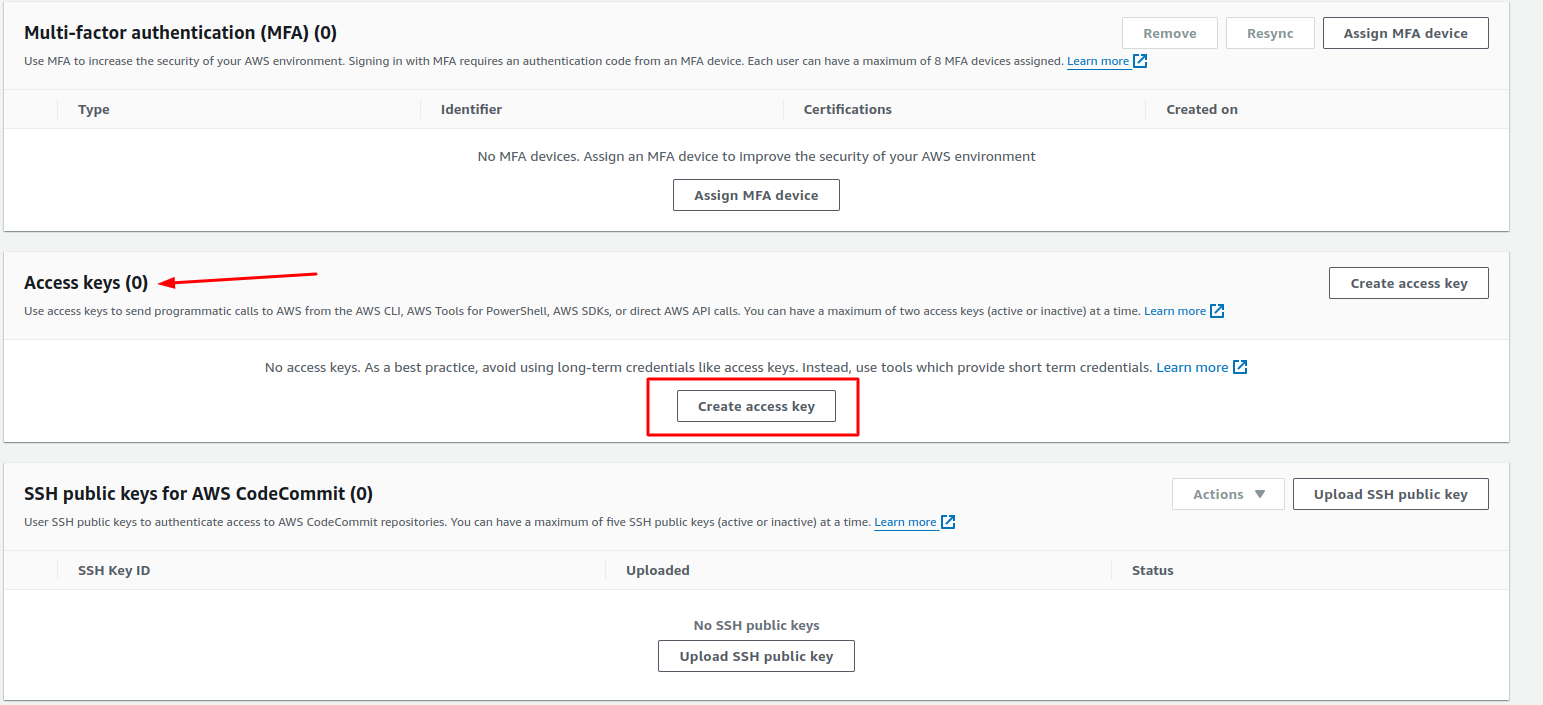
Step 9: Click on Create access key.
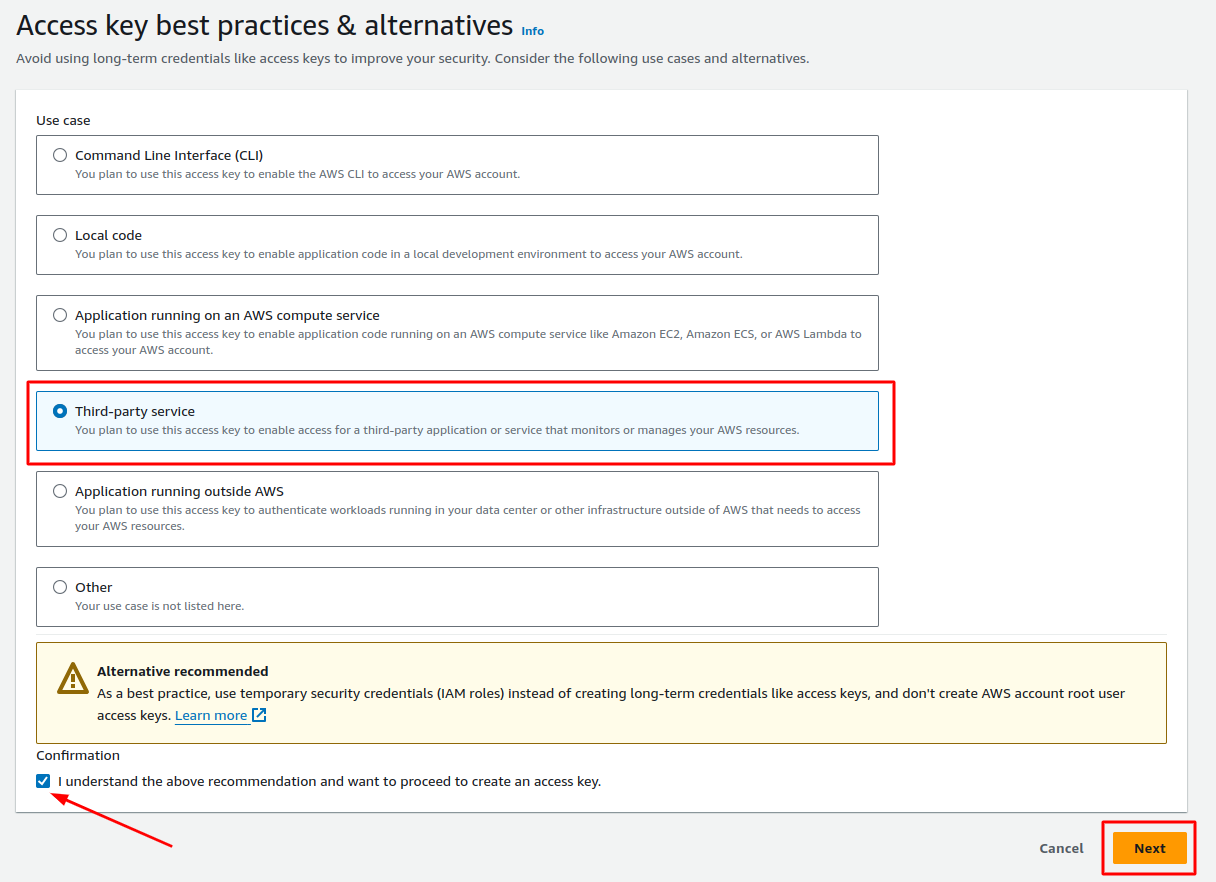
Step 10: Select Third-party service and select the checkbox about confirmation of I understand the above recommendation and want to proceed to create an access key. Click on the Next button.
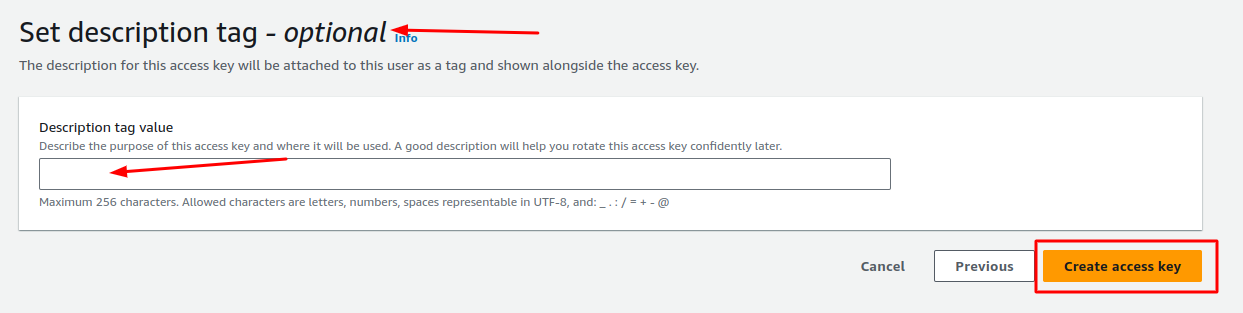
Step 11: Enter Description tag value that is (Optional) and Click on Create access key button.
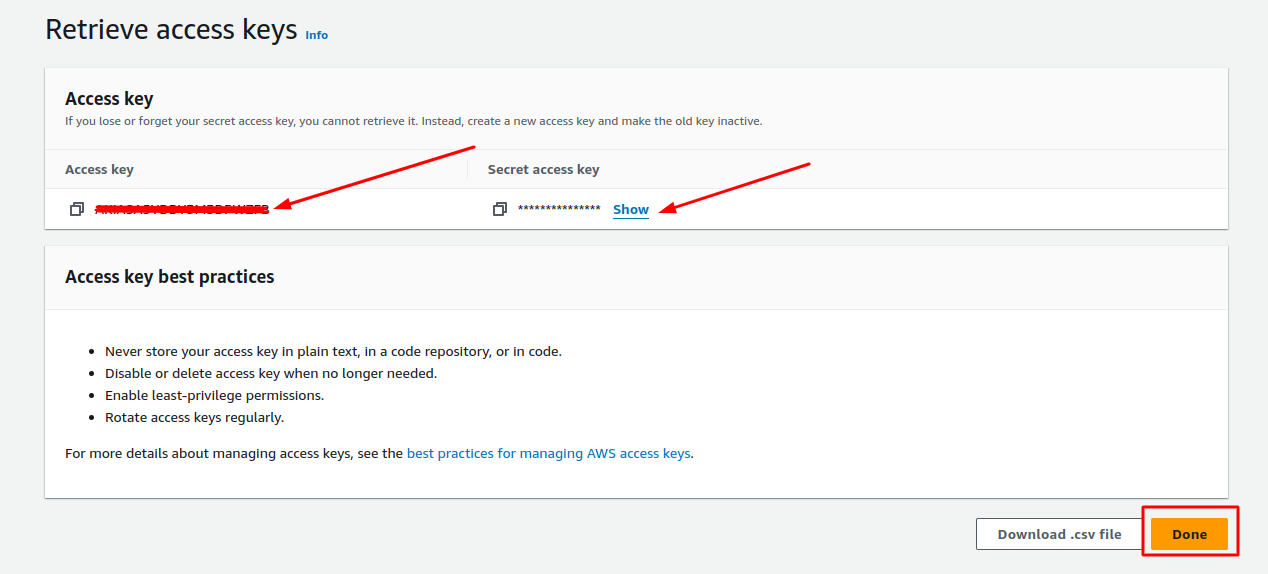
Step 12: Copy the access key and Secret access key and save them.
Integrate Amazon Lightsail into your Self Hosted Panel
Step 1: First, log in to the Self Hosted panel, and go to admin side by clicking on Admin as shown in the image below.
Step 2: Click on the Integrations -> Cloud Platforms option from the left side panel.
Step 3: Click on the + Add button.
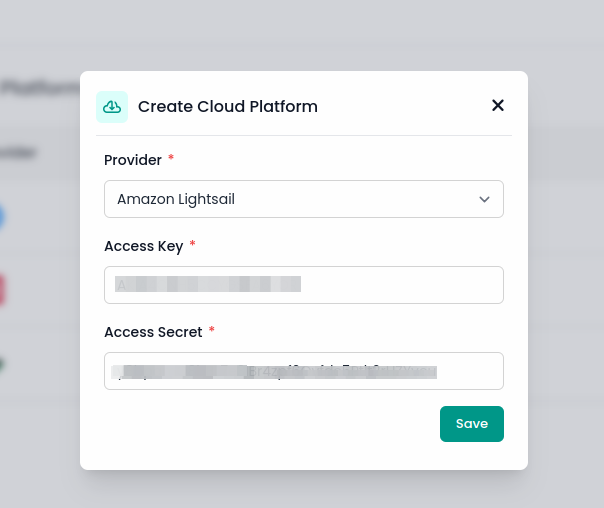
Step 4: A popup will appear. Select Amazon Lightsail from the provider dropdown, enter the Access Key and Access Secret generated from the Amazon Lightsail panel, and click on the Save button.
You can Edit or Delete this token later.

You can enable or disable a provider if you don't want it to be visible to your users. If you disable a provider using the Active column switch, Amazon Lightsail will not be shown to your users when they create a server.
To set Plans for Amazon Lightsail, see the Set Plans Section.
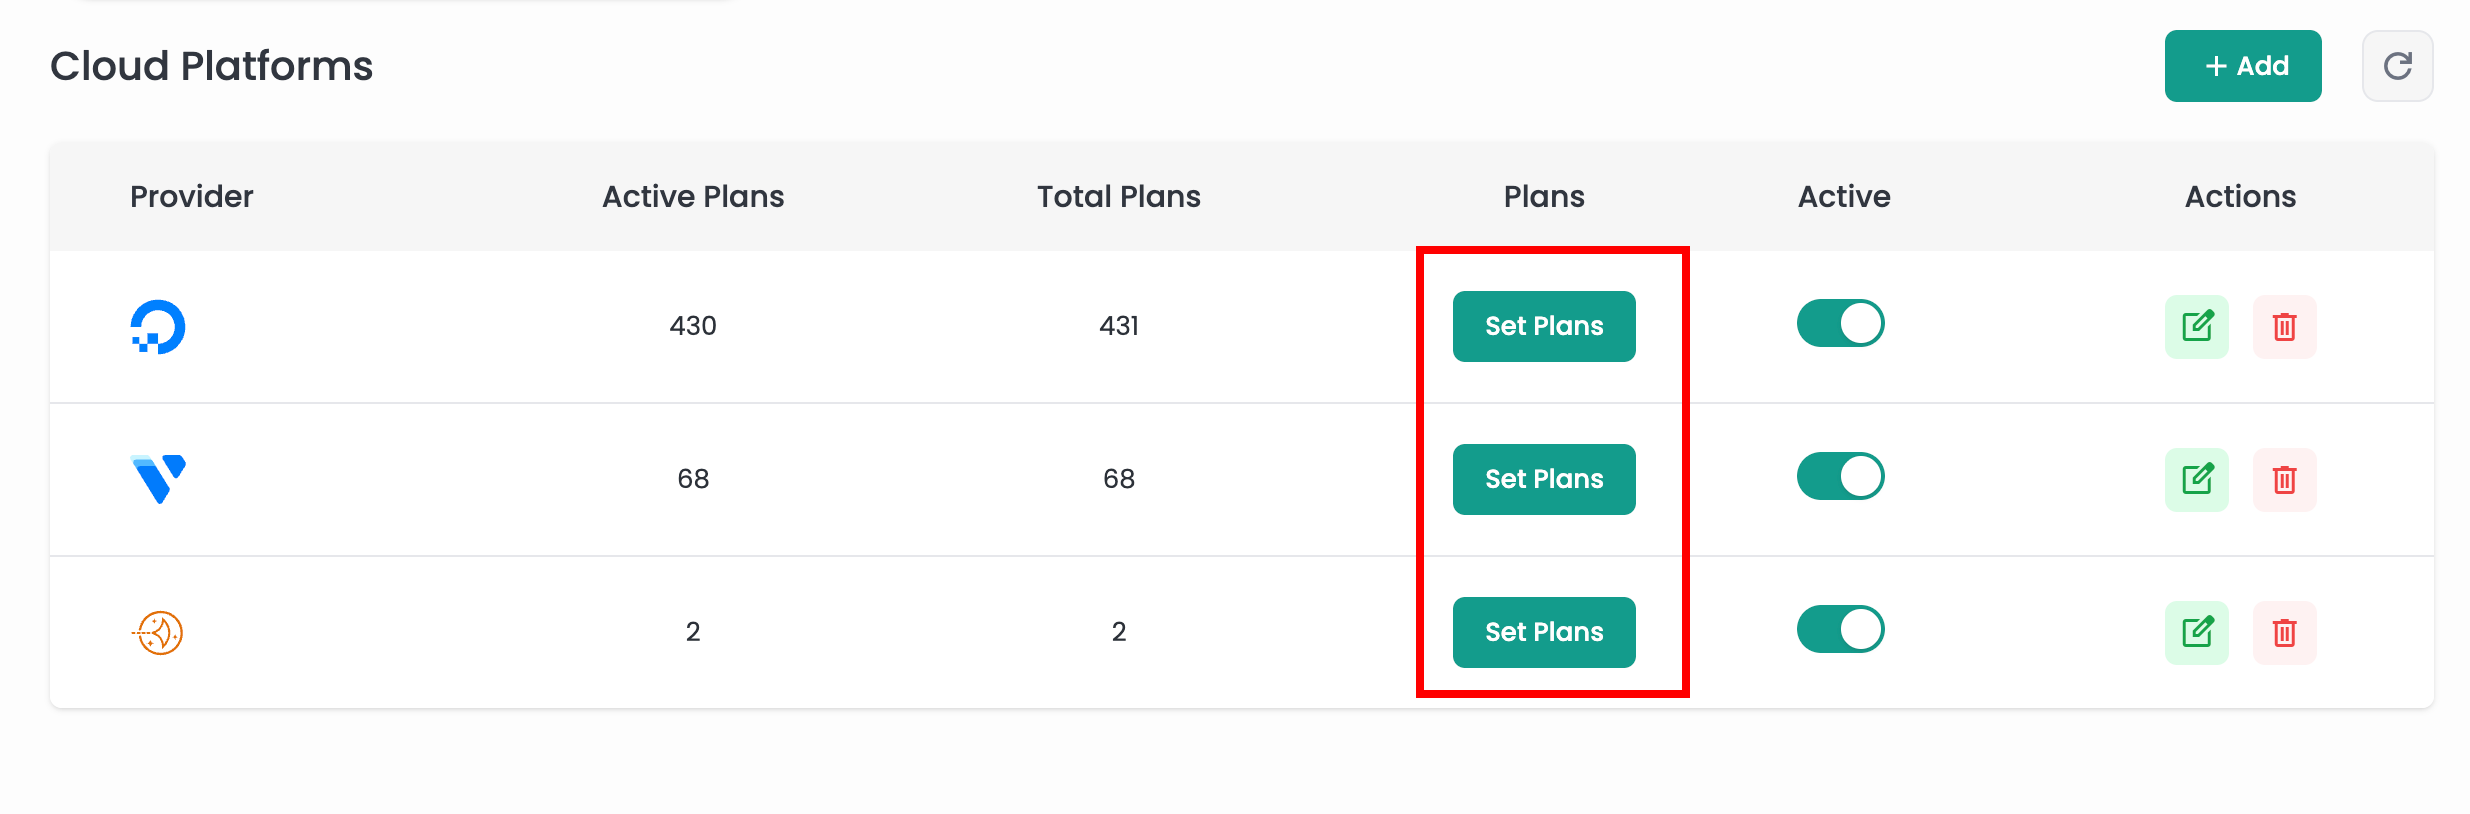
Set Plans
Step 1: Click on the Set Plans button for the provider you want to configure a plan for.
Step 2: You can view the Set Plans form.
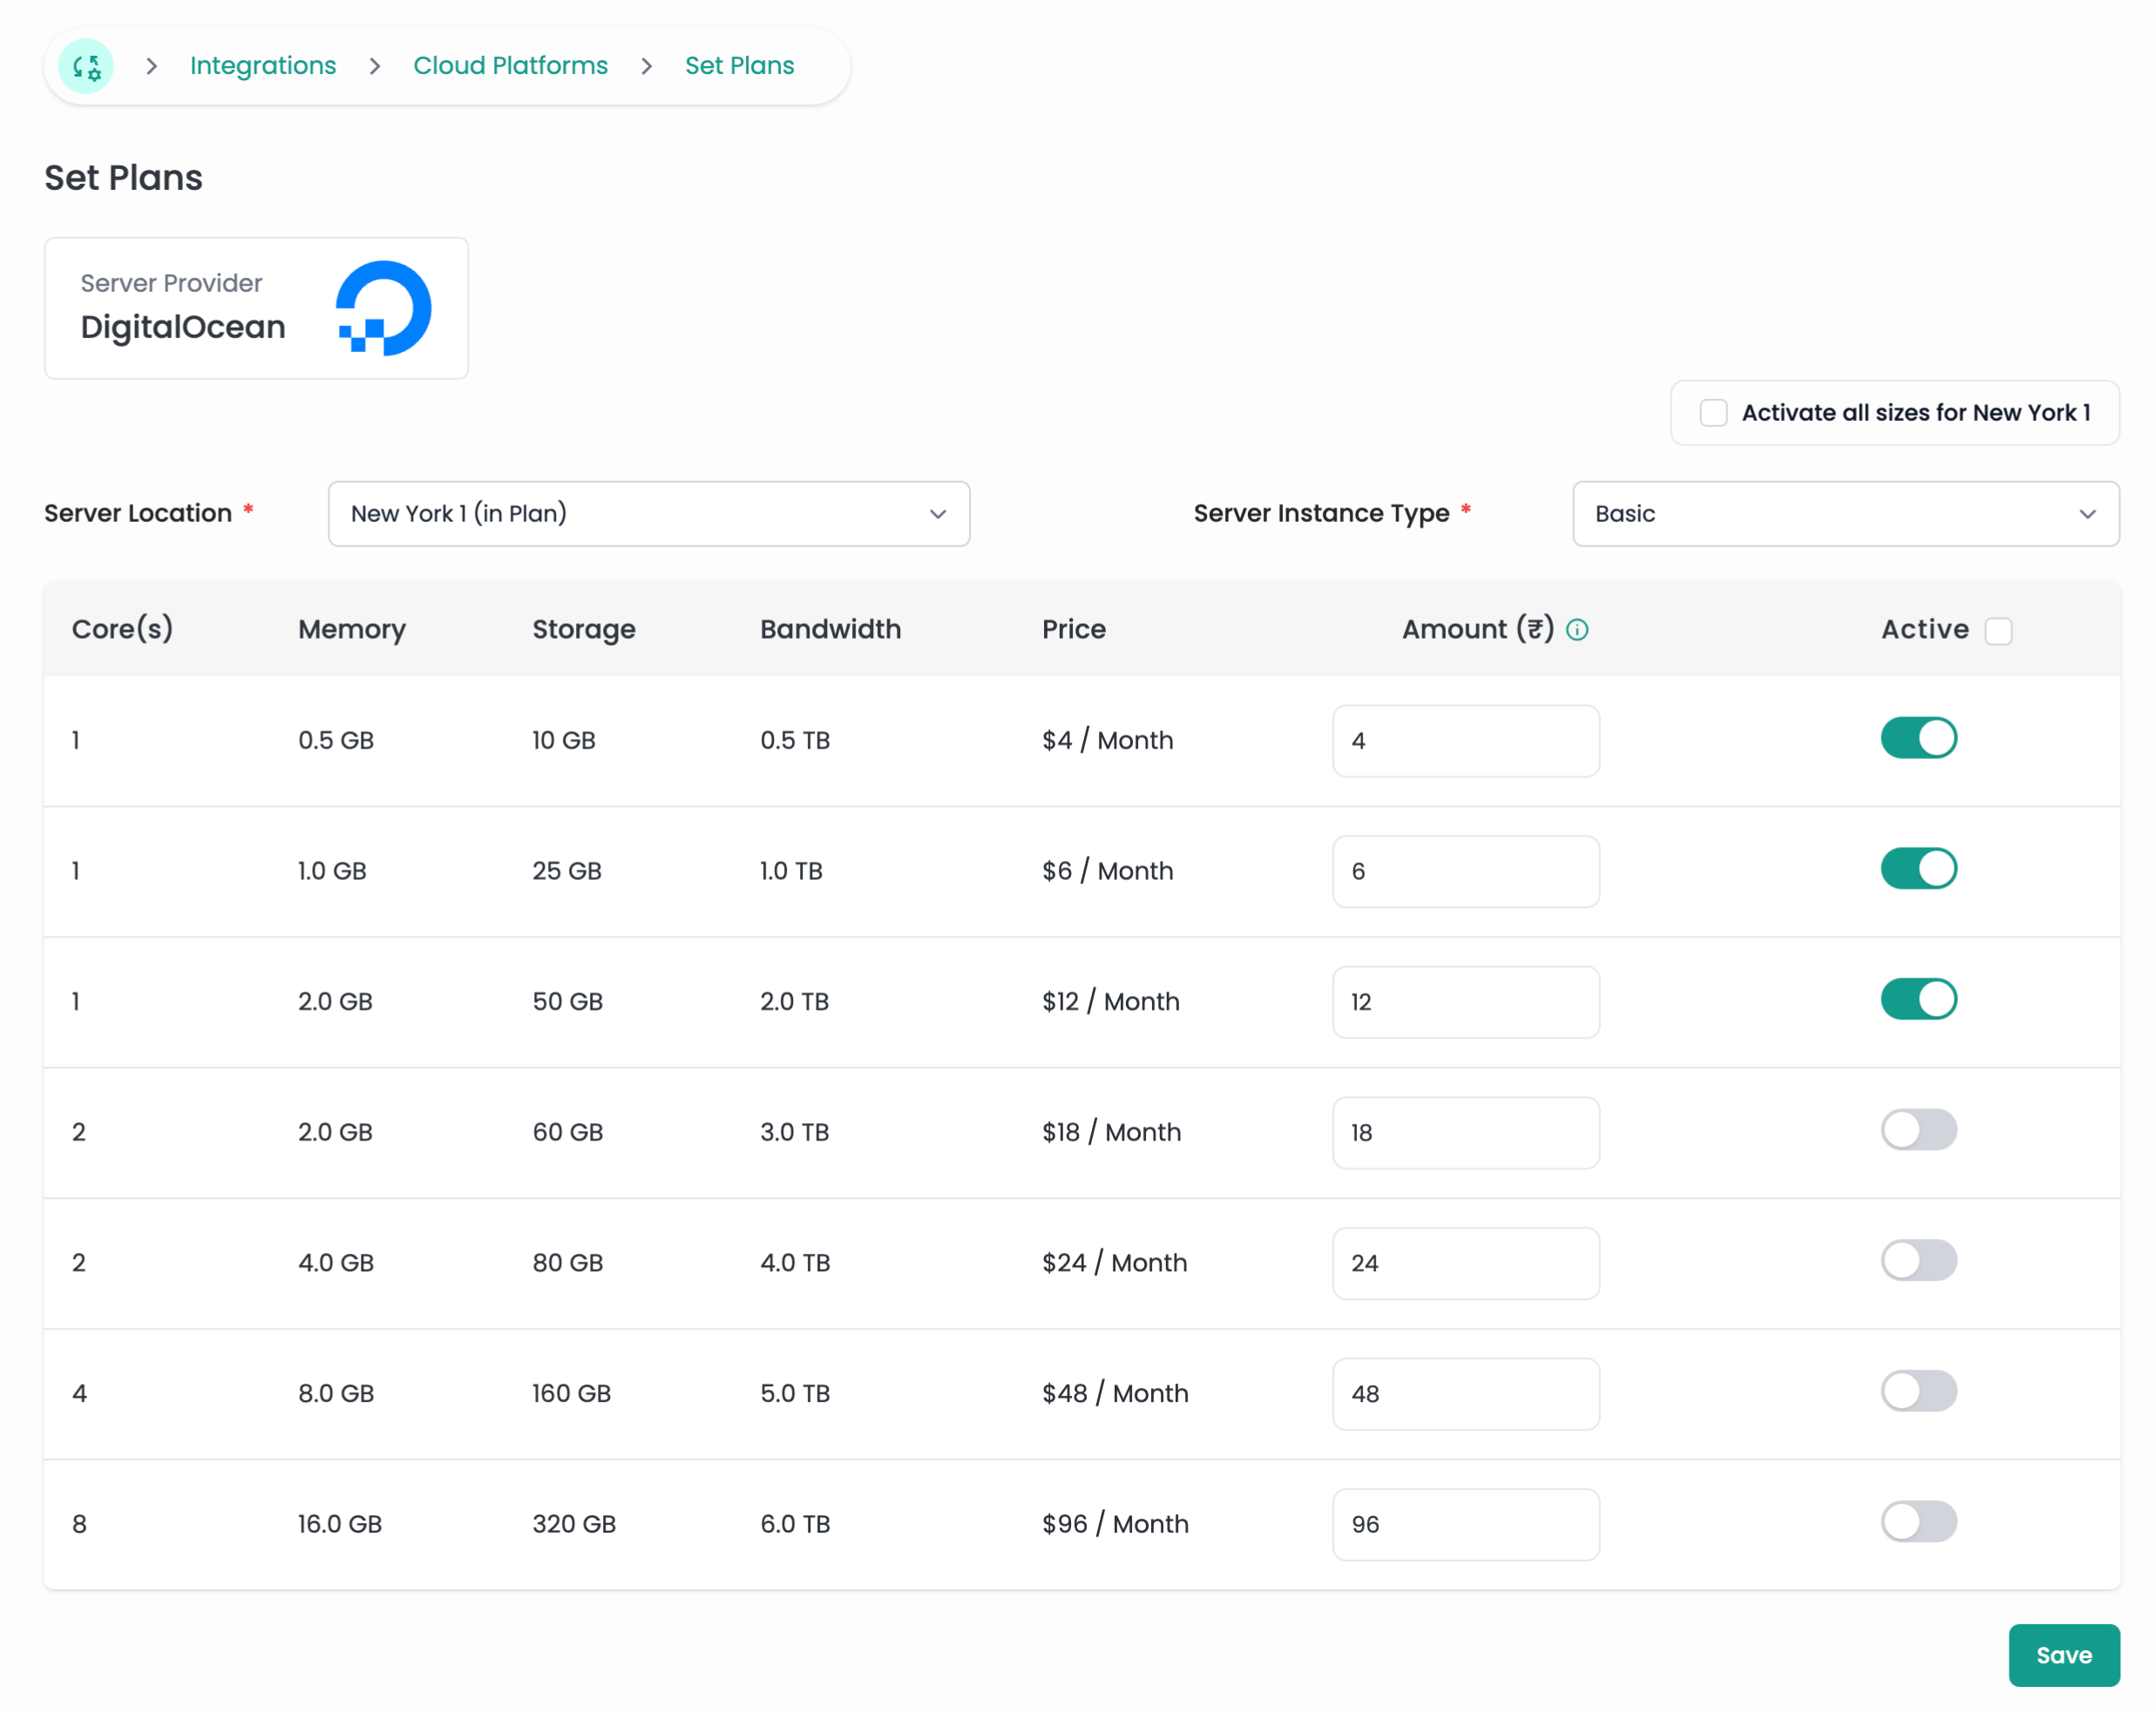
Here’s a detailed explanation of the fields in the "Set Plans" screen shown in the image.
- Activate all sizes for Region: Selecting this checkbox will enable all plans of all instance types for the selected region.
- Server Location: A dropdown menu to select the server location from the available data centers provided by the cloud provider.
- Server Instance Type: Another dropdown menu that allows selecting the type of server instance. The instance types may vary depending on the provider, offering different configurations like Basic, Standard, Premium, etc.
- Price: This field displays the actual monthly cost for the server plan as provided by the cloud provider.
- Amount: This input field allows setting a custom price that users will be charged when they create a server. The value entered here will be shown to users instead of the actual provider price and will be used for billing purposes. For instance, if you set $10 in the amount field, users will see and be billed this amount rather than the provider's $6 price.
- Active: A toggle switch that allows enabling or disabling a specific server plan. If a plan is activated, it will be visible to users when they create a server. If disabled, it will not be shown to users.
After configuring the plans, clicking the Save button will save the changes, making the active plans and their respective prices available to users.
You can configure the plans for all providers in a similar manner. Repeat this process for each provider to ensure that all their plans are configured according to your requirements.