Plan
You can set a price for creating a server according to the cloud providers, which will be shown to your users when they create a server.
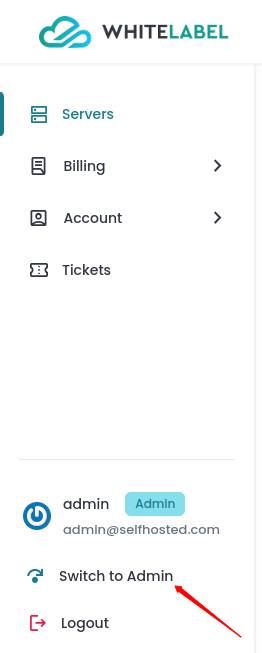
Step 1: First, log in to the Self Hosted panel, and go to admin side by clicking on Admin as shown in the image below.

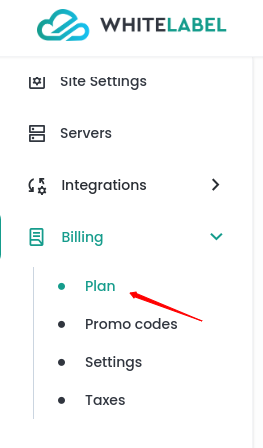
Step 2: Click on the Billing -> Plan option from the left side panel and you can see the Plan management.

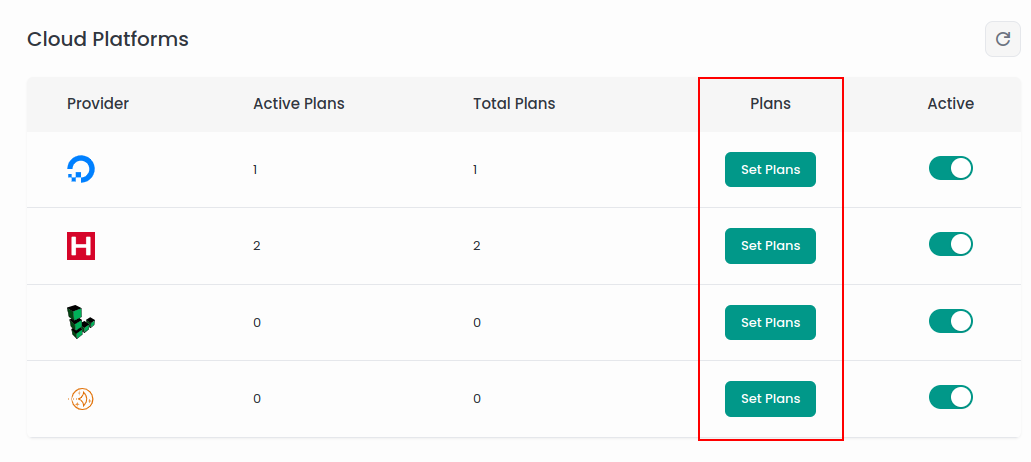
Step 3: You can view the cloud platform table as shown in the image below. Click on the Set Plan button for the provider you want to configure a plan for.

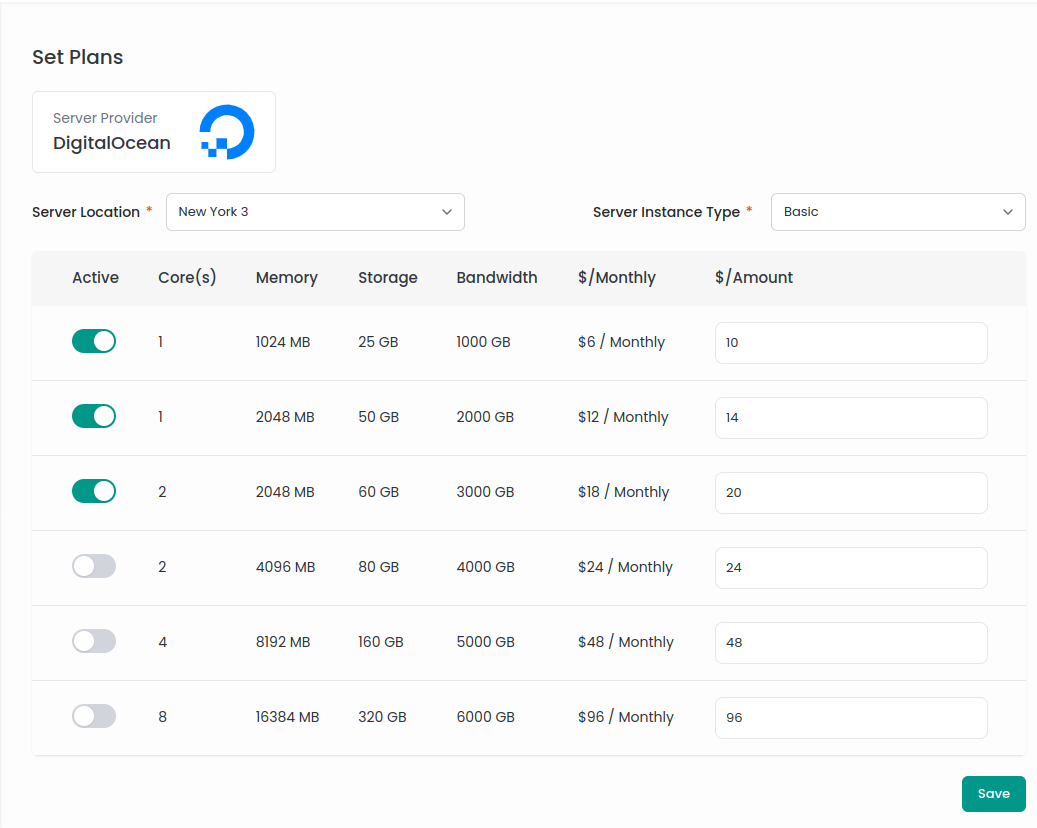
Step 4: You can view the Set Plans form.

Here’s a detailed explanation of the fields in the "Set Plans" screen shown in the image.
- Server Location: A dropdown menu to select the server location from the available data centers provided by the cloud provider.
- Server Instance Type: Another dropdown menu that allows selecting the type of server instance. The instance types may vary depending on the provider, offering different configurations like Basic, Standard, Premium, etc.
- Active: A toggle switch that allows enabling or disabling a specific server plan. If a plan is activated, it will be visible to users when they create a server. If disabled, it will not be shown to users.
- $/Monthly: This field displays the actual monthly cost for the server plan as provided by the cloud provider.
- $/Amount: This input field allows setting a custom price that users will be charged when they create a server. The value entered here will be shown to users instead of the actual provider price and will be used for billing purposes. For instance, if you set $10 in the amount field, users will see and be billed this amount rather than the provider's $6 price.
After configuring the plans, clicking the Save button will save the changes, making the active plans and their respective prices available to users.
You can configure the plans for all providers in a similar manner. Repeat this process for each provider to ensure that all their plans are configured according to your requirements.